Stable Diffusion How-To
French writer and philosopher Voltaire once said that “originality is nothing but judicious imitation” and when it comes to the use of artificial intelligence, he’s absolutely right.
Using a wealth of complex math, powerful supercomputers can be used to analyze billions of images and text, creating a numerical map of probabilities between the two. One such map is called Stable Diffusion and since it made an appearance, it’s been the subject of wonder, derision, and fervent use.
And best of all, you can use it, too, thanks to our detailed guide on how to use Stable Diffusion to generate AI images and more besides!
What exactly is Stable Diffusion?
The short answer is that Stable Diffusion is a deep learning algorithm that uses text as an input to create a rendered image. The longer answer is… complex… to say the least, but it all involves a bunch of computer-based neural networks that have been trained with selected datasets from the LAION-5B project — a collection of 5 billion images and an associated descriptive caption. The end result is something that, when given a few words, the machine learning model calculates and then renders the most likely image that best fits them.
Stable Diffusion is unusual in its field because the developers (a collaboration between Stability AI, the Computer Vision & Learning Group at LMU Munich, and Runway AI) made the source code and the model weights publicly available. Model weights are essentially a very large data array that controls how much the input affects the output.
There are two major releases of Stable Diffusion — version 1 and version 2. The main differences lie in the datasets used to train the models and the text encoder. There are four primary models available for version 1:
- SD v1.1 = created from 237,000 training steps at a resolution of 256 x 256, using the laion2b-en subset of LAION-5B (2.3 billion images with English descriptions), followed by 194,000 training steps at a resolution of 512 x 512 using the laion-high-resolution subset (0.2b images with resolutions greater than 1024 x 1024).
- SD v1.2 = additional training of SD v1.1 with 515,000 steps at 512 x 512 using the laion-improved-aesthetics subset of laion2B-en, adjusted to select images with higher aesthetics and those without watermarks
- SD v1.3 = further training of SD v1.2 using around 200k steps, at 512 x 512, of the same dataset as above, but with some additional math going on behind the scenes
- SD v1.4 = another round of 225k steps of SD v1.3
For version 2, all of the datasets and neural networks used were open-source and differed in image content.
The update wasn’t without criticism but it can produce superior results — the base model can be used to make images that are 768 x 768 in size (compared to 512 x 512 in v1) and there’s even a model for making 2k images.
When getting started in AI image generation, though, it doesn’t matter what model you use. With the right hardware, a bit of computing knowledge, and plenty of spare time to explore everything, anyone can download all the relevant files and get stuck in.
Getting started with AI image creation
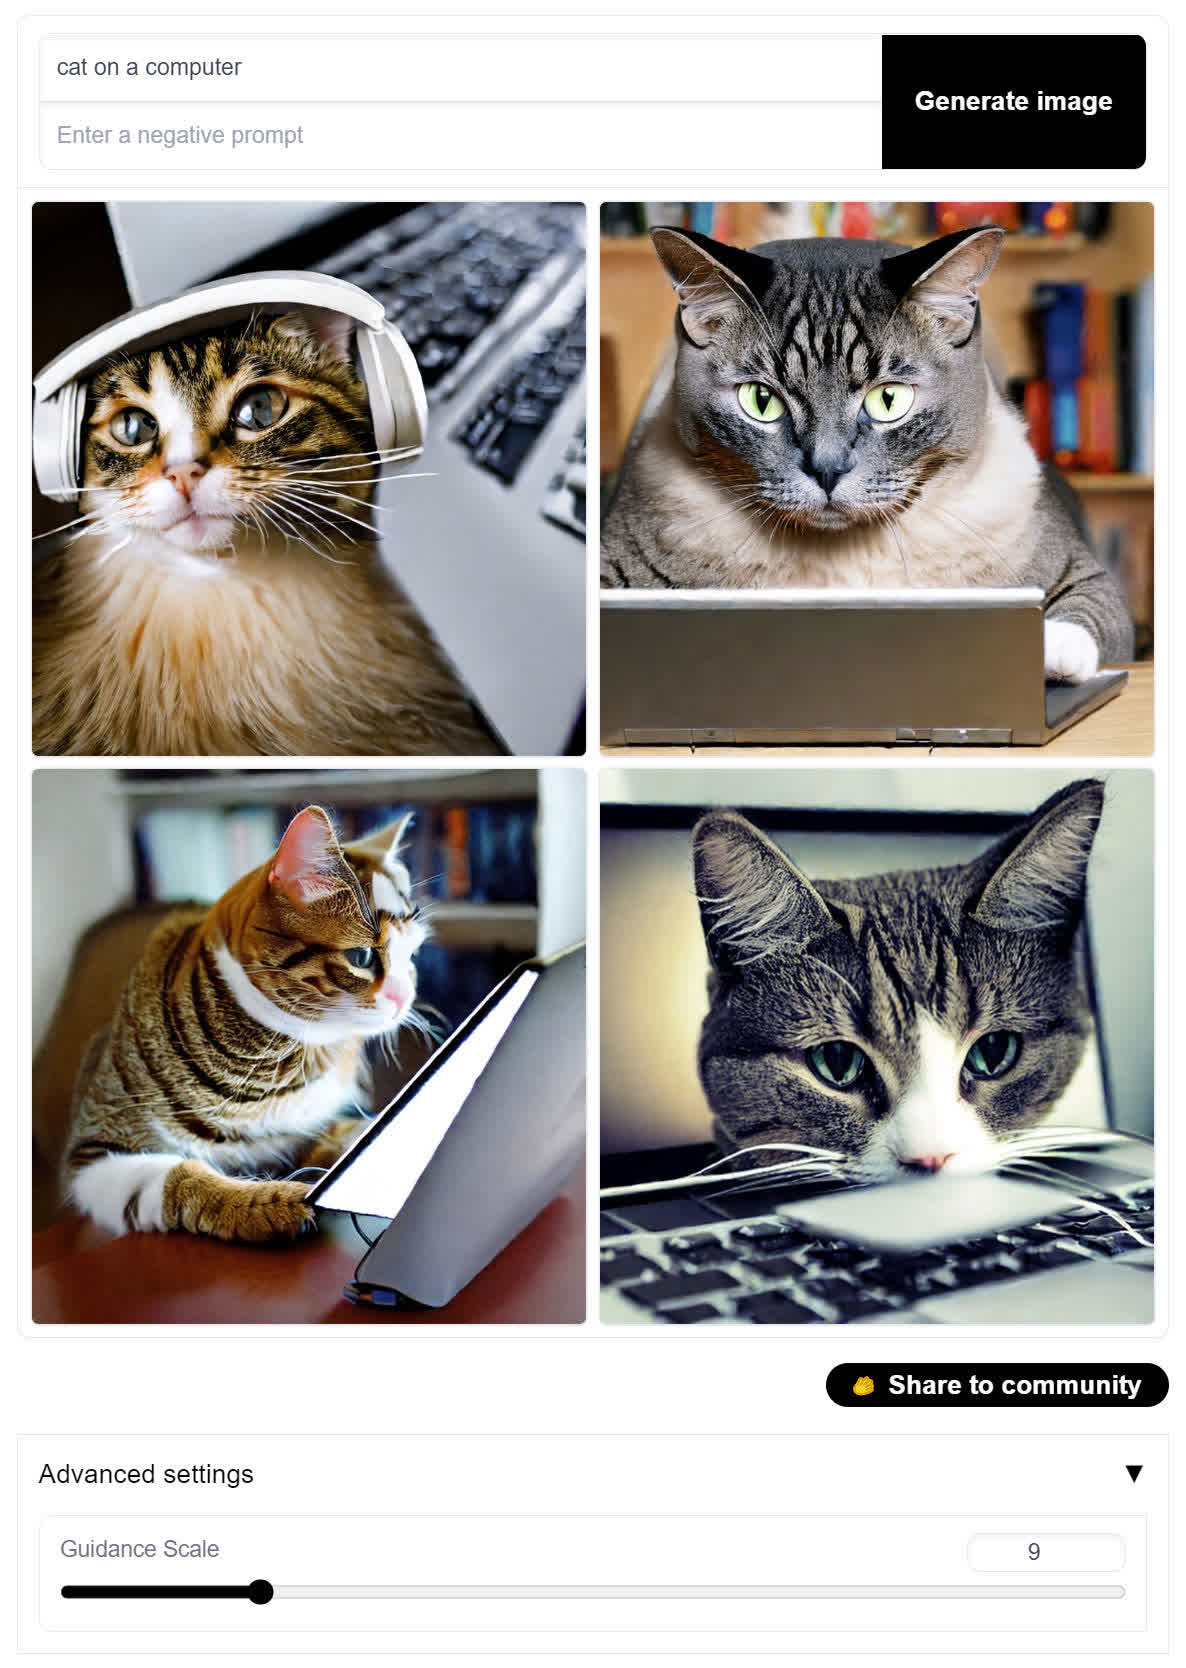
If you want a quick and simple go at using Stable Diffusion without getting your hands dirty, you can try a demo of it here.
You have two text fields to complete: the first is a positive prompt that tell the algorithm to focus on those input words. The second, a negative prompt, tells the algorithm to remove such items from the image it is about to generate.
There’s one additional thing you can alter in this simple demo. Under the Advanced Options, the higher guidance scale is, the more rigidly the algorithm will stick to the input words. Set this too high and you’ll end up with an unholy mess, but it’s still worth experimenting to see what you can get.
The demo is rather limited and slow because the calculations are being done on a server. If you want more control over the output, then you’ll need to download everything onto your own machine. So let’s do just that!
One-click installers for Windows and a macOS alternative
While this article is based on a more involved installation process of the Stable Diffusion webUI project (next section below) and we mean to explain the basic tools at your disposal (don’t miss the section about prompts and samples!), the SD community is rapidly evolving and an easier installation method is one of those things desired by most.
We have three potential installation shortcuts:
Right before we published this article we discovered Reddit’s discussion about A1111’s Stable Diffusion WebUI Easy Installer, which automates most of the download/installation steps below. If it works for you, great. If not, the manual process is not so bad.
There’s a second excellent project called NMKD Stable Diffusion GUI which means to do the same, but it’s all contained in a single downloadable package that works like a portable app. Just unpack and run. We tried it and it worked beautifully. NMKD’s project is also one of the few to support AMD GPUs (still experimental).
For MacOS users, there’s also an easy install option and app called DiffusionBee which works great with Apple processors (works a tad slower with Intel chips). It requires macOS 12.5.1 or higher.
Installing Stable Diffusion on Windows
Let’s begin with an important caveat — Stable Diffusion was initially developed to be processed on Nvidia GPUs and you’ll need one with at least 4GB of VRAM, though it performs a lot better with double that figure. Due to the open-source nature of the project, it can be made to work on AMD GPUs, though it’s not as easy to setup and it won’t run as fast; we’ll tackle this later on in the article.
For now, head over to the Stable Diffusion webUI project on GitHub. This is a work-in-progress system that manages most of the relevant downloads and instructions and neatly wraps it all up in a browser-based interface.
Step 1 — Install Python
The first step is to download and install Python 3.10.6.
When you install Python, make sure you check the Add to Path option. Everything else can remain in the default settings.
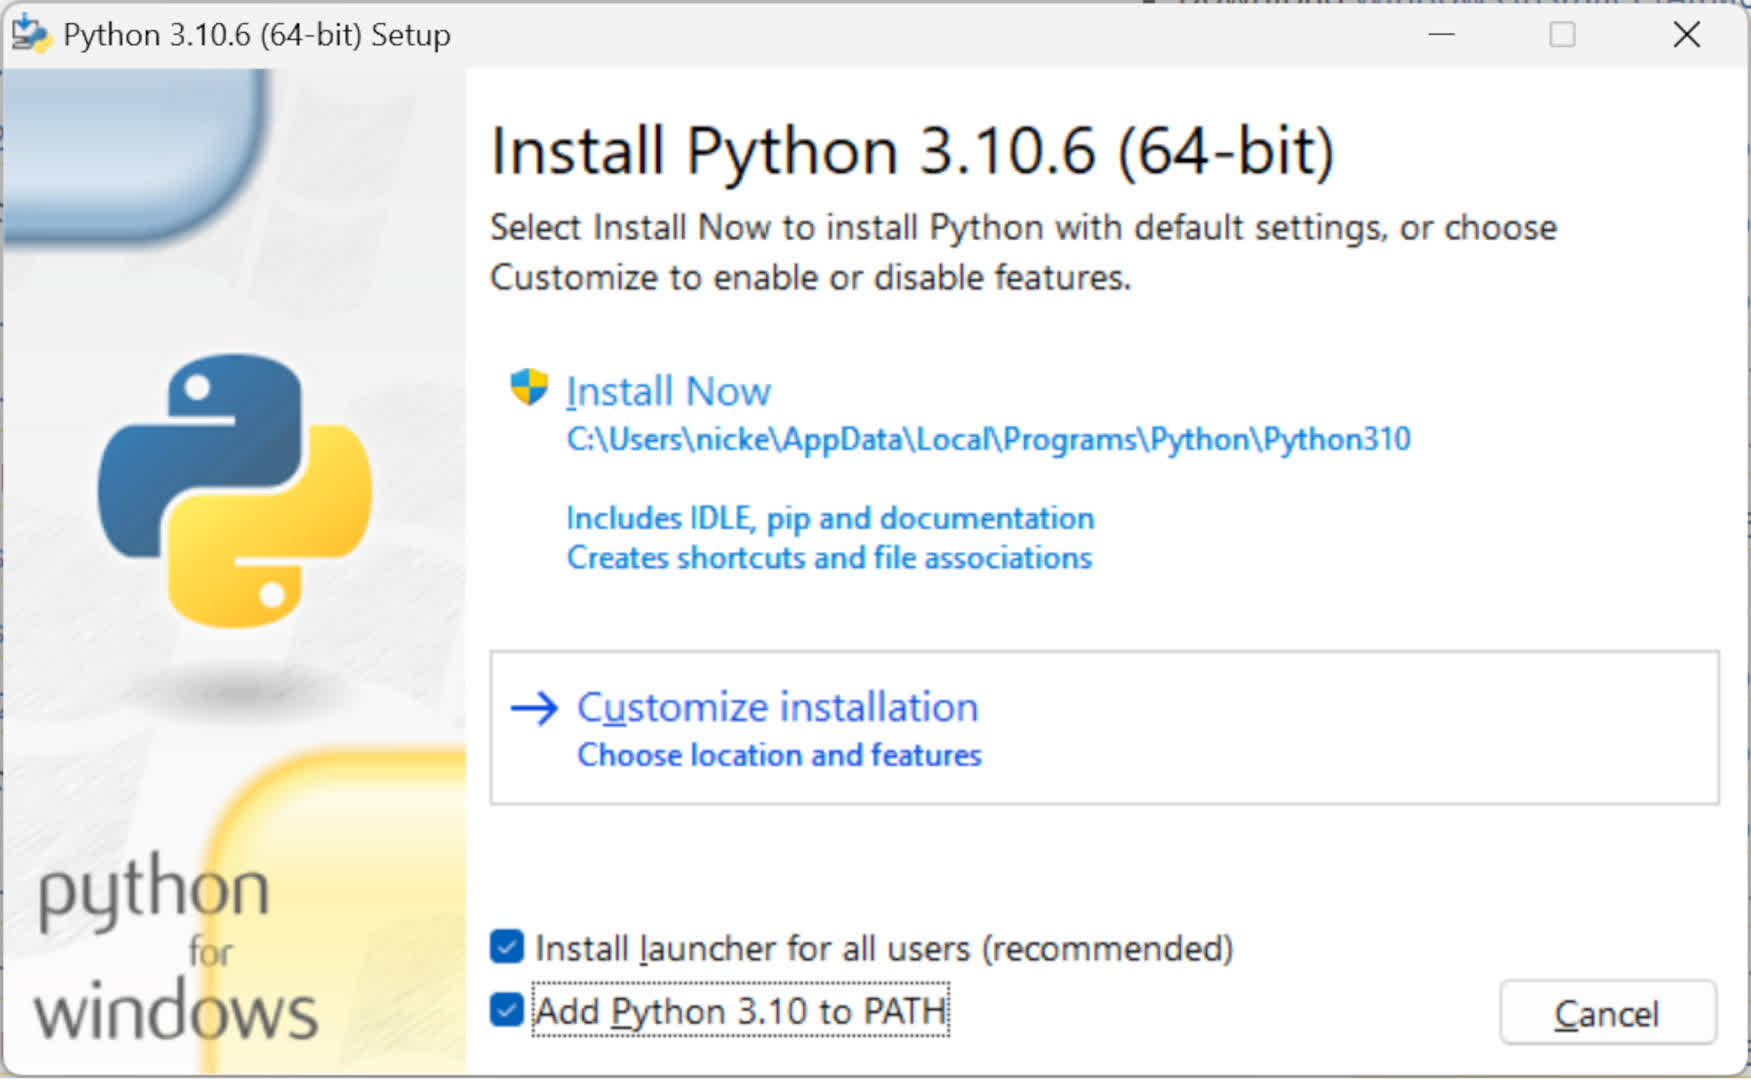
If you’ve already got versions of Python installed, and you don’t need to use them, then uninstall those first. Otherwise, create a new user account, with admin rights, and switch to that user before installing v3.10.6 — this will help to prevent the system from getting confused over what Python it’s supposed to use.
Step 2 — Install Git
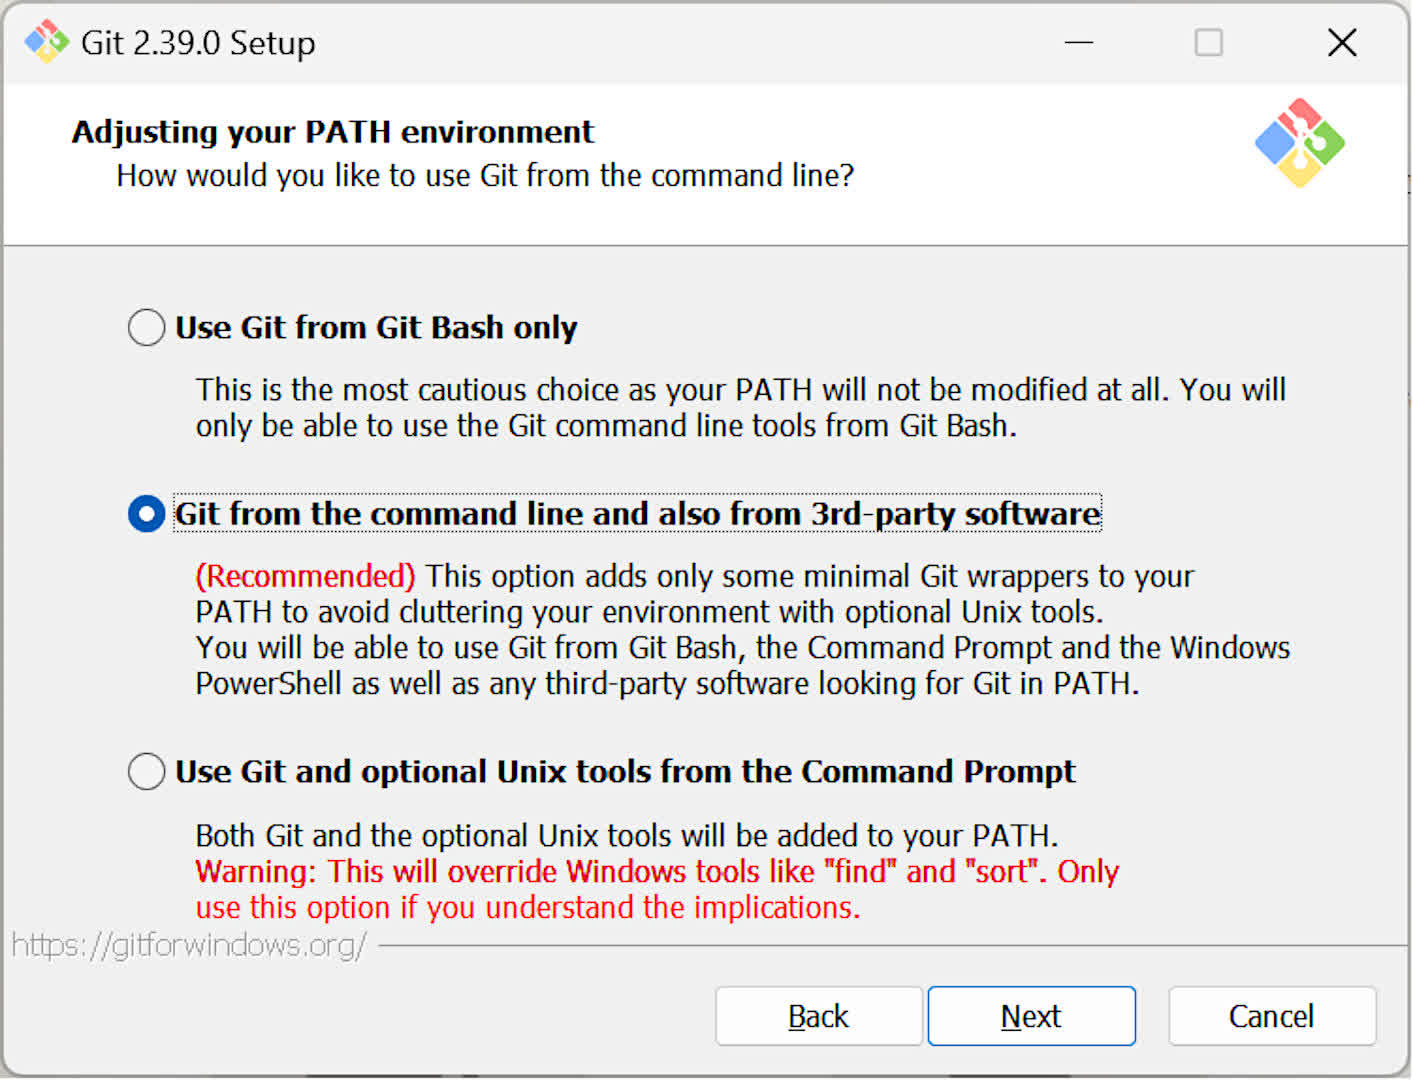
The next thing to do is installing Git — this will automate collecting all of the files you need from GitHub. You can leave all of the installation options in the default settings, but one that is worth checking is the path environment one.
Make sure that this is set to Git from the command line, as we’ll be using this to install all of the goodies we need.
Step 3 — Copy Stable Diffusion webUI from GitHub
With Git on your computer, use it copy across the setup files for Stable Diffusion webUI.
- Create a folder in the root of any drive (e.g. C:/) — and name the folder “sdwebui”
- Press Windows key + R, type in cmd, to open the classic command prompt
- Enter cd then type in cd sdwebui
- Then type: git clone https://github.com/AUTOMATIC1111/stable-diffusion-webui.git . and press Enter
There’s supposed to be a space between the final t and the period — this stops Git from creating an extra folder to navigate, every time you want to use Stable Diffusion webUI.
Depending on how fast your internet connection is, you should see a whole stack of folders and files. Ignore them for the moment, as we need to get one or two more things.
Step 4 — Download the Stable Diffusion model
Choosing the right model can be tricky. There are four primary models available for SD v1 and two for SD v2, but there’s a whole host of extra ones, too. We’re just going to use v1.4 because it’s had lots of training and it was the one we had the most stability with on our test PC.
Stable Diffusion webUI supports multiple models, so as long as you have the right model, you’re free to explore.
The file you want ends with .ckpt but you’ll notice that there are two (e.g. sd-v1-1.ckpt and sd-v1-1-full-ema.ckpt) — use the first one, not the full-ema one.
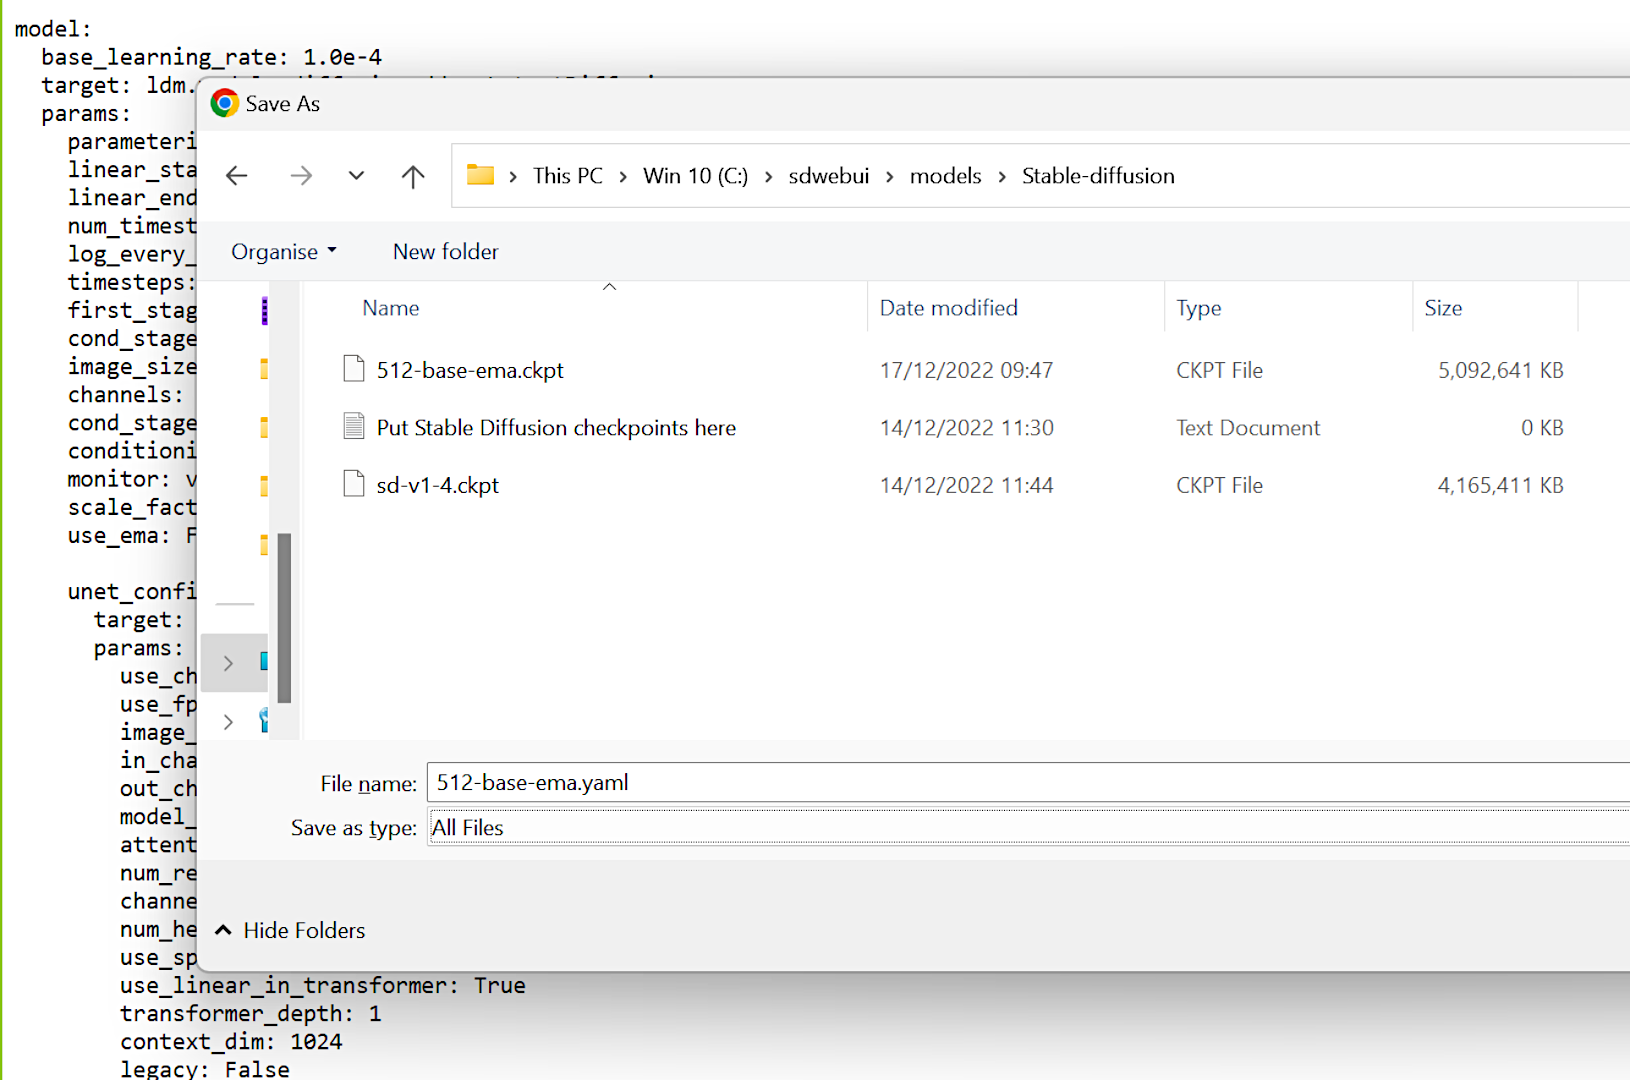
The model files are large (over 4GB), so that will take a while to download. Once you have it, move the file to C:sdwebuimodelsStable-diffusion folder — or to the folder you created to house Stable Diffusion webUI.
Note that if you’re planning to use Stable Diffusion v2 models, you’ll need to add a configuration file in the above folder.
You can find them for SD webUI here (scroll down to the bottom of the page) — click on the one you need to use, then press CTRL+S, change the Save as Type to All files, and enter the name so that it’s the same as the model you’re using. Finally, ensure that the name ends with the .yaml format.
Step 5 — Running Stable Diffusion webUI for the first time
You’re nearly done!
To start everything off, double-click on the Windows batch file labeled webui.bat in the sdwebui folder. A command prompt window will open up, and then the system will begin to retrieve all the other files needed.
This can take a long time and often shows little sign of progress, so be patient.
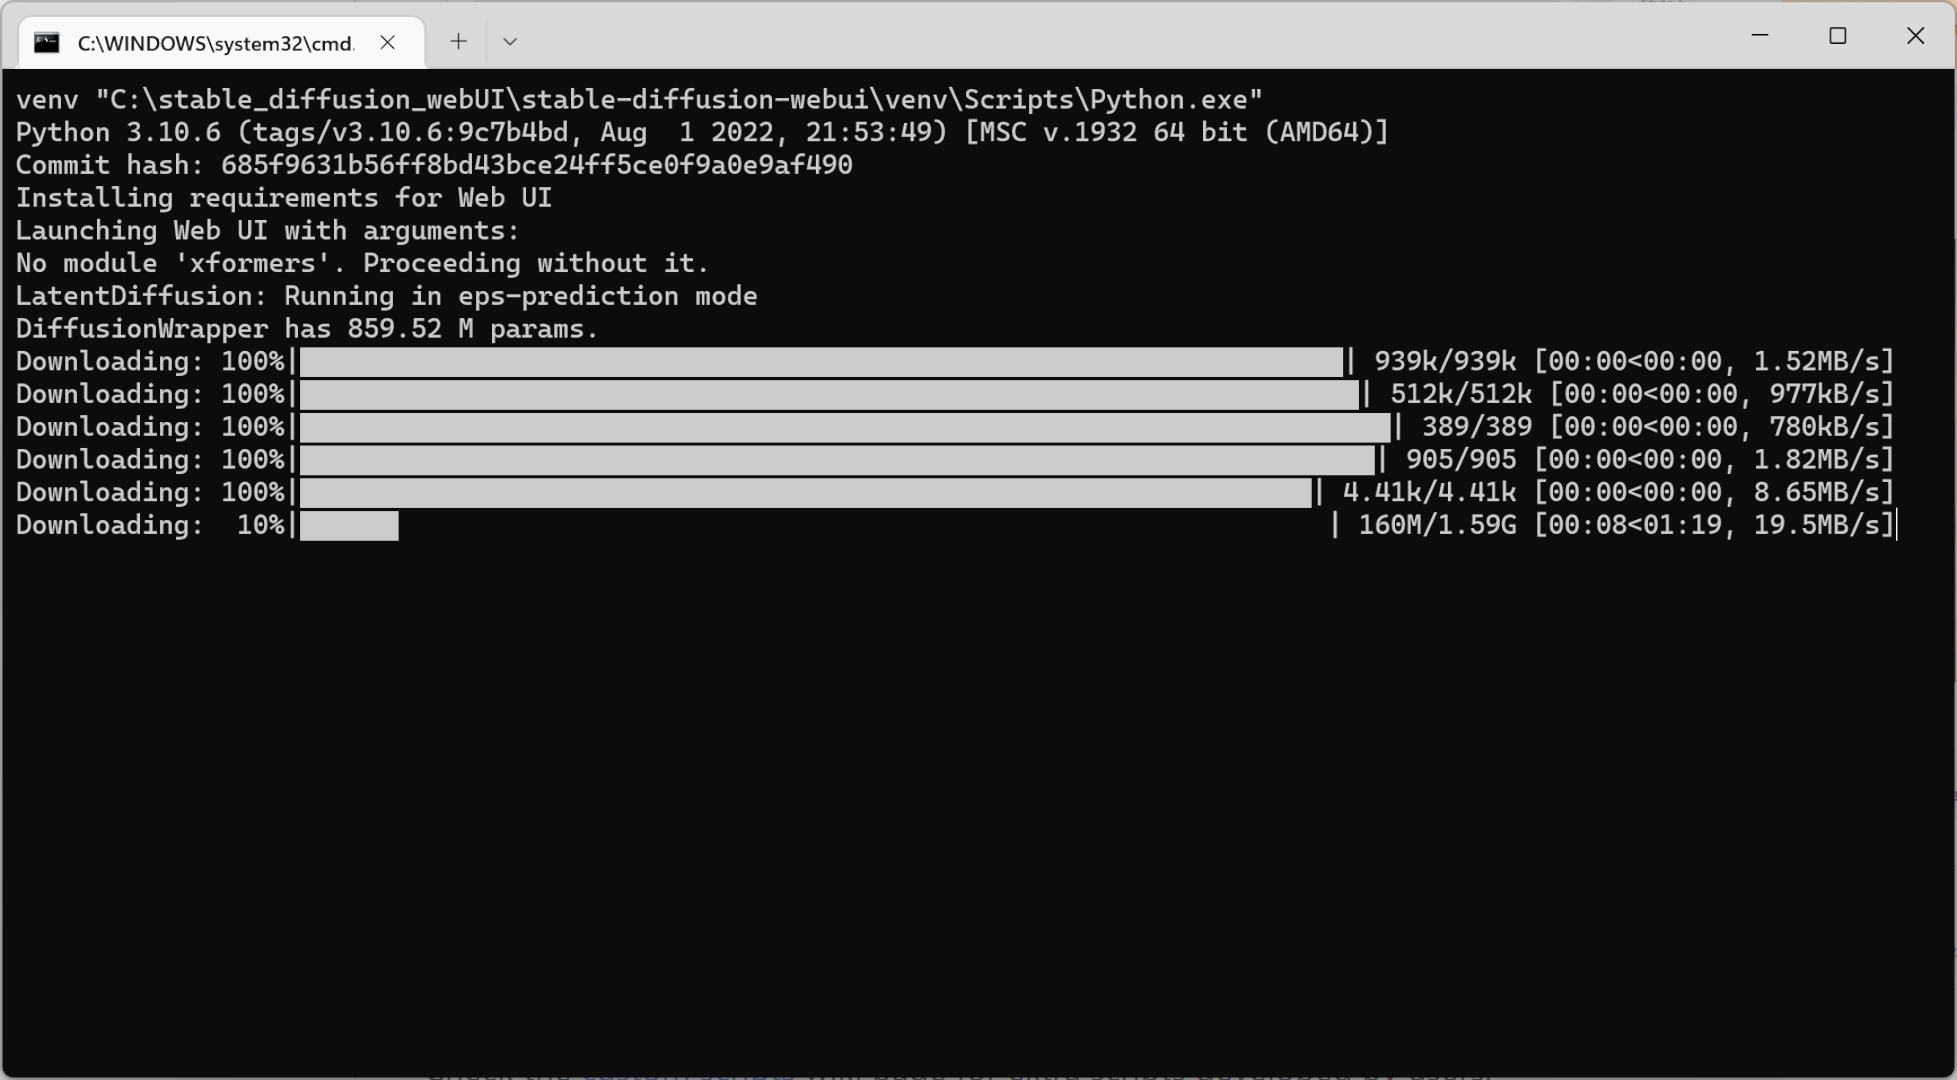
You’ll need to run the webui.bat file every time you want to use Stable Diffusion, but it will fire up much quicker in the future, as it will already have the files it needs.
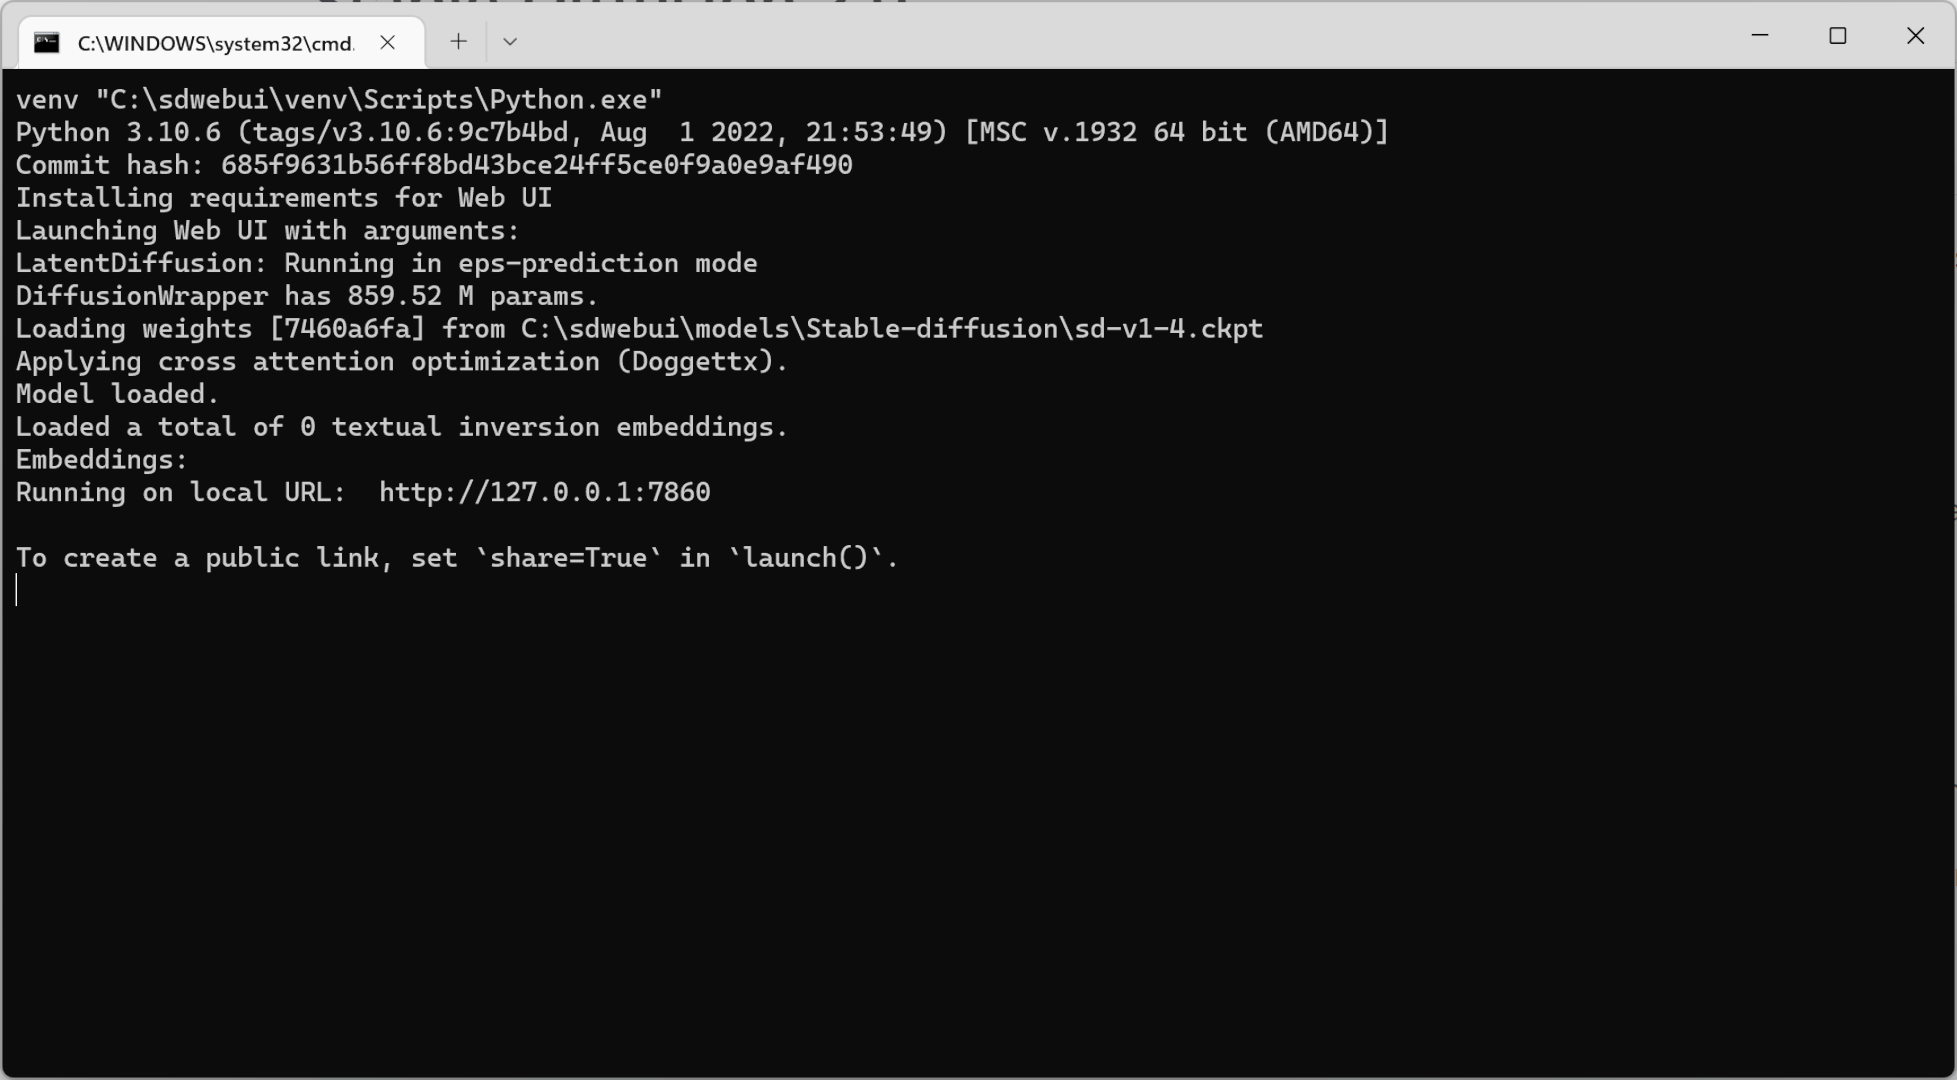
The process will always finish with the same final few lines in the command window. Pay attention to the URL it provides — this is the address you will enter into a web browser (Chrome, Firefox, etc.) to use Stable Diffusion webUI.
Highlight and copy this IP address, open up a browser, paste the link into the address field, press Enter, and bingo!
You’re ready to start making some AI-generated images.
Going all AI Bob Ross
When Stable Diffusion webUI (or SDWUI for short) is running, there will be two windows open — a command window and the browser tab. The browser is where you will enter inputs and outputs, so when you’re done and what to shut down SD, make sure you close down both windows.
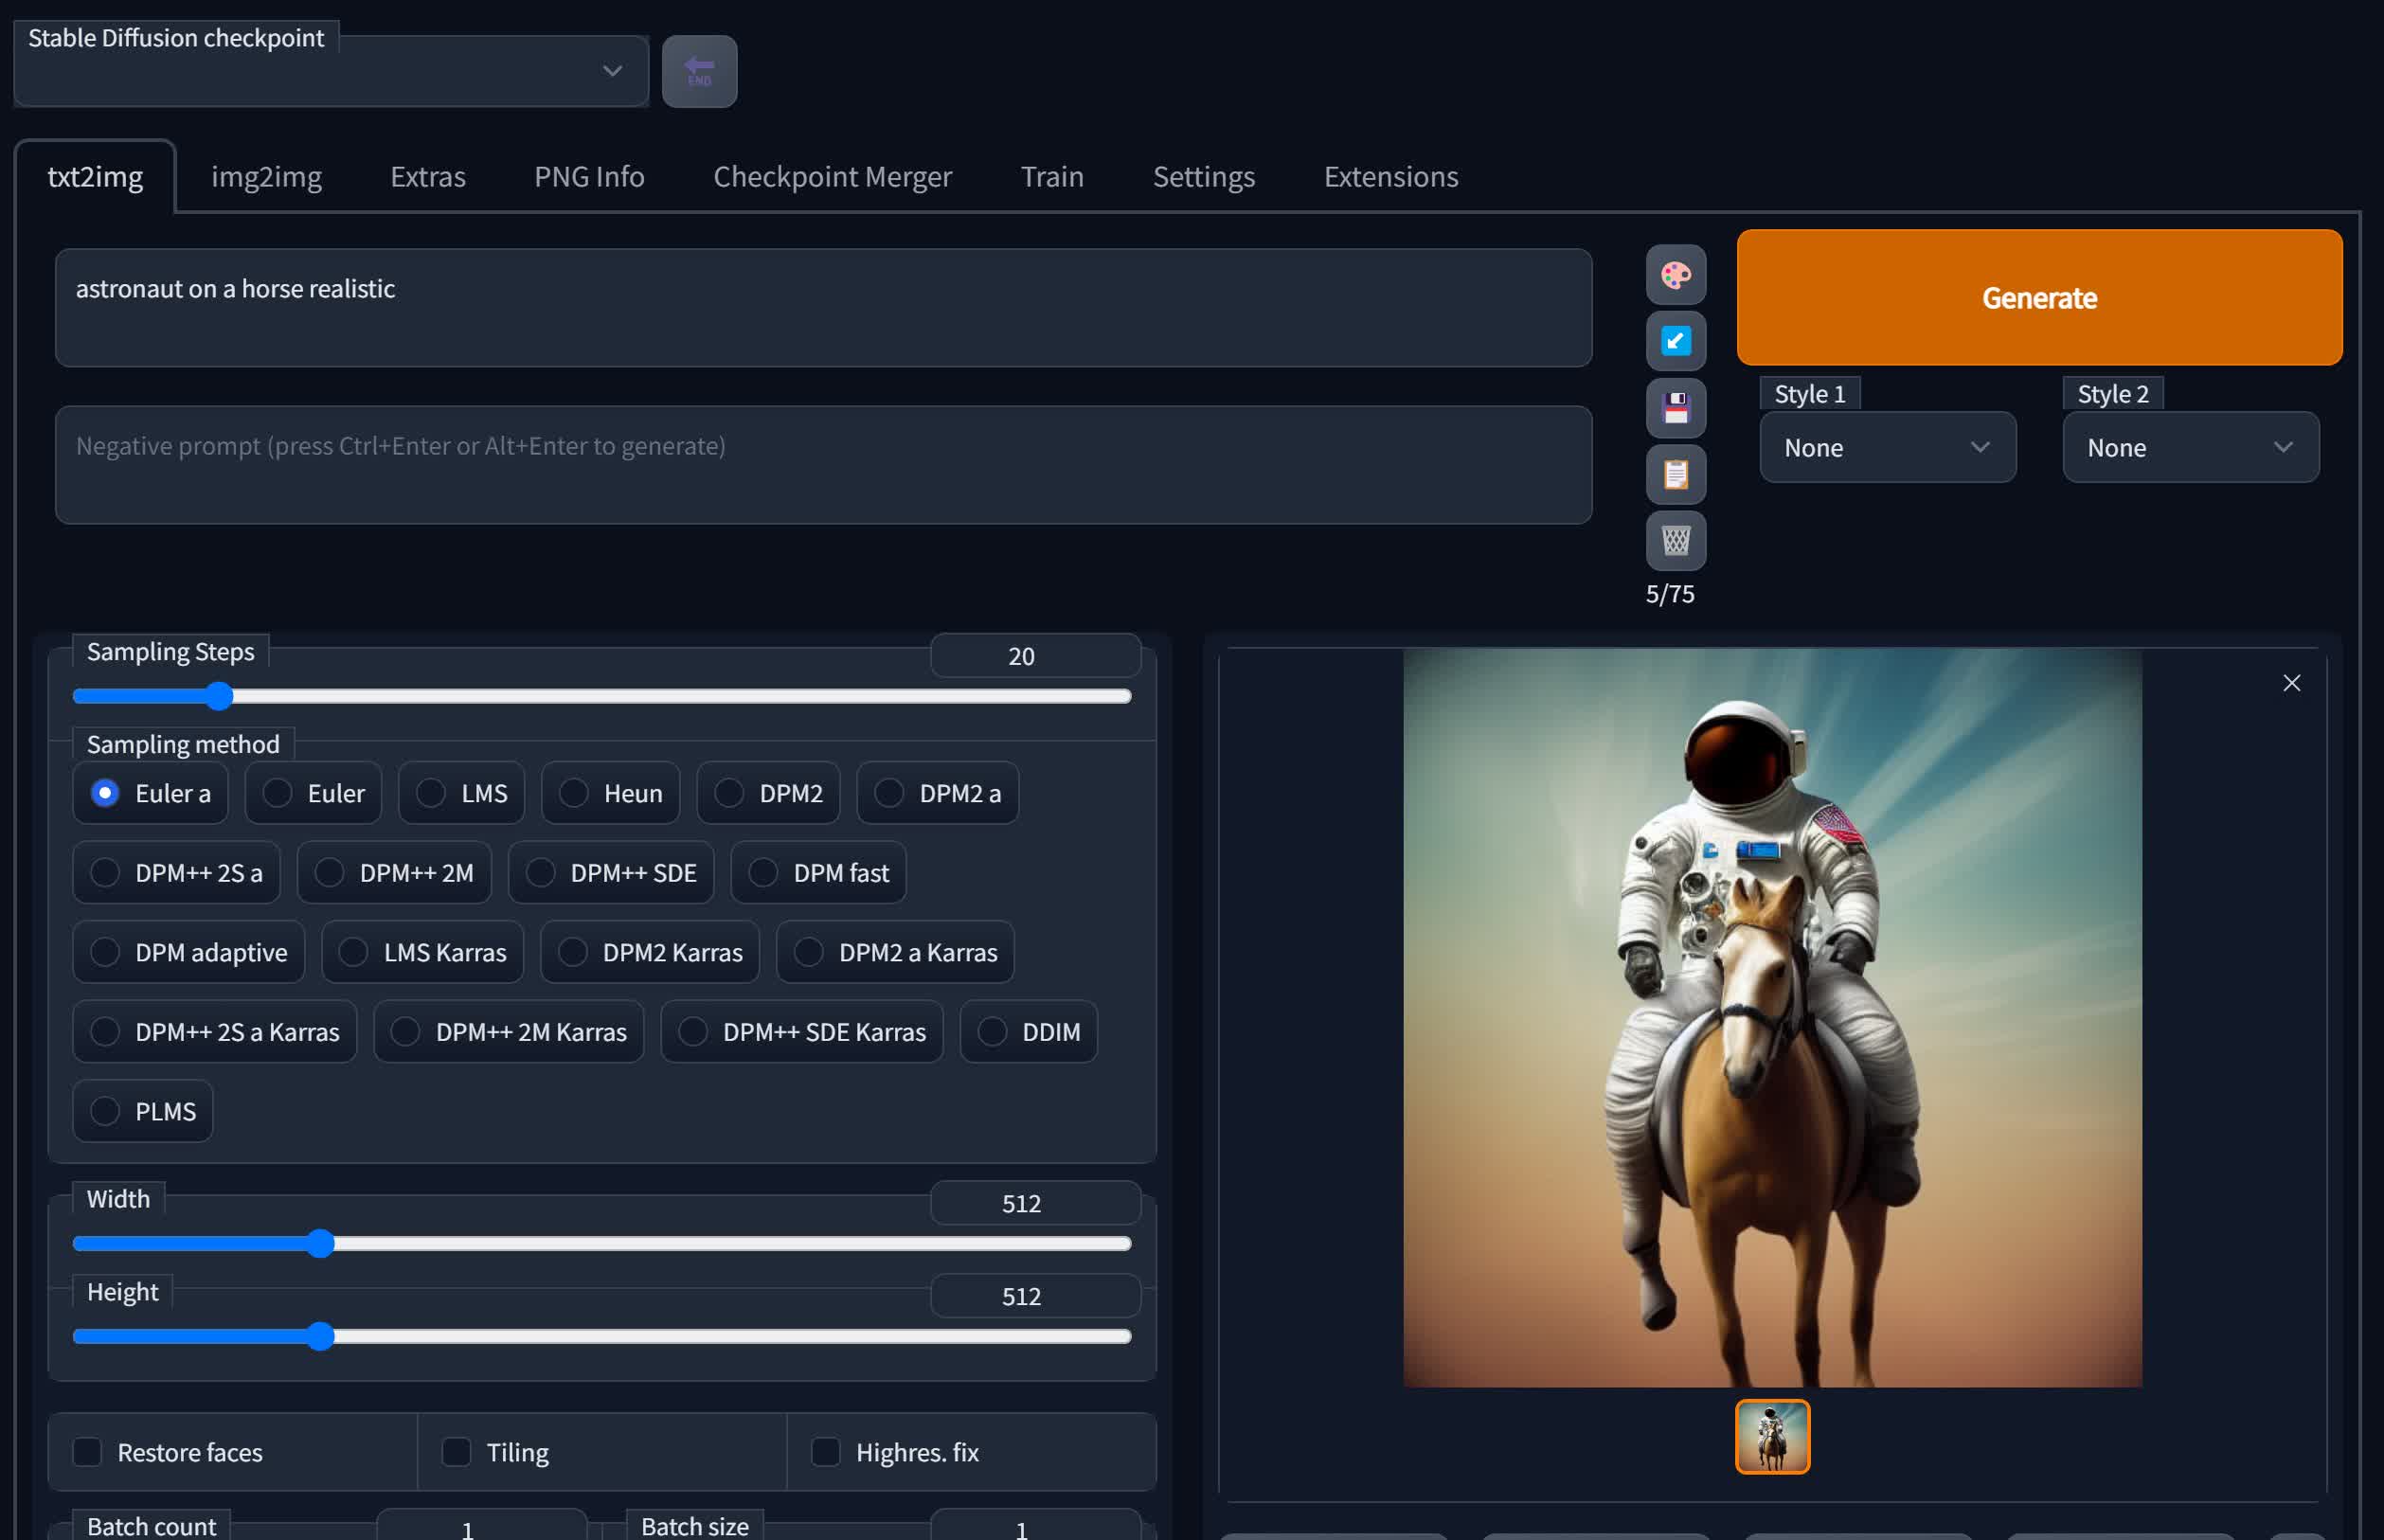
You’ll notice there’s an enormous raft of options at your fingertips. Fortunately, you can get started immediately, so let’s begin by adding some words to the Prompt field, starting with the ‘Hello World’ equivalent of AI-imagery:
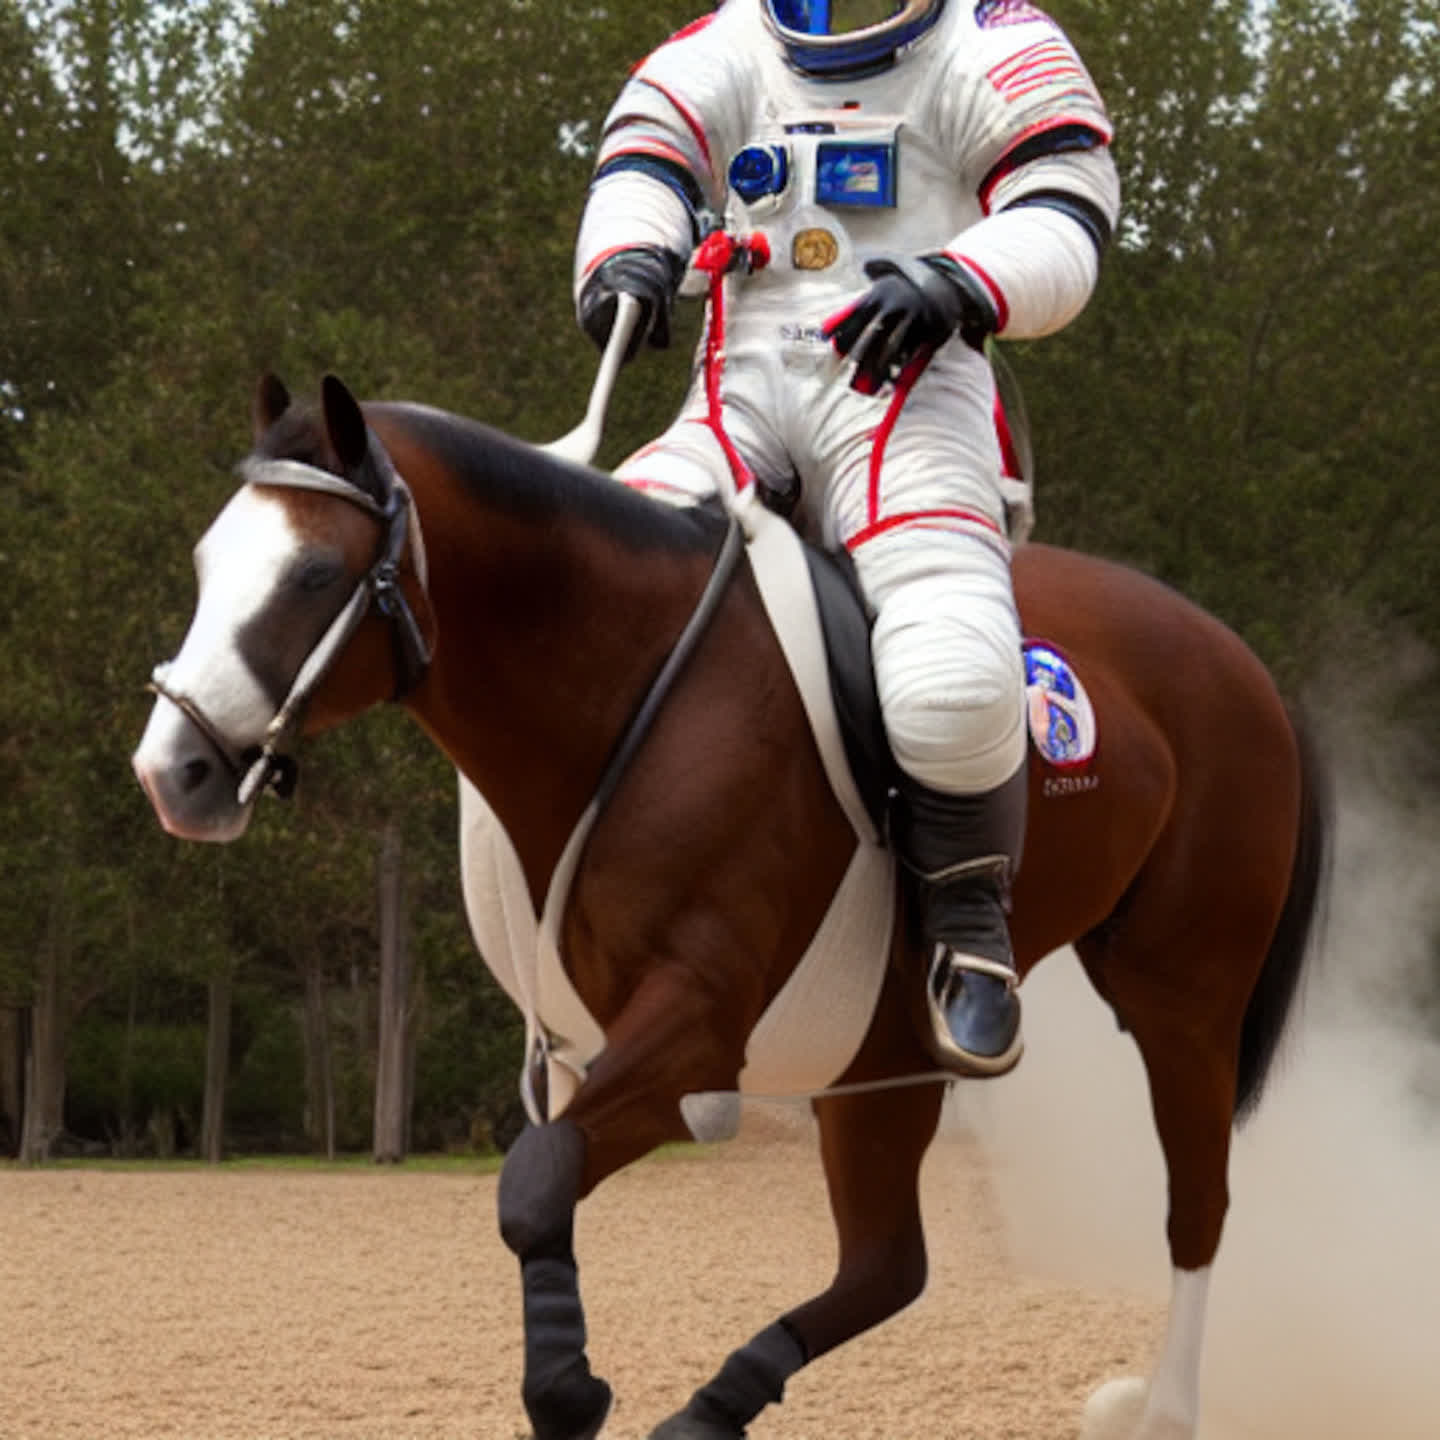
“astronaut on a horse”
If you leave the Seed value at -1, it will randomize the generation starting point each time, so we’re going to use a value of 1 but you test out any value you like.
Now, just click the big Generate button!
Depending on your system’s specs, you’ll have your first AI-generated image within a minute or so…
SDWUI stores all generated images in the outputstxt2img-images folder. Don’t worry that the image appears so small. Well, it is small — just 512 x 512, but since the model was mostly trained on images that size, this is why the program defaults to this resolution.
But as you can see, we definitely have an image of an astronaut riding a horse. Stable Diffusion is very sensitive to prompt words and if you want to focus on specific things, add the words to the prompt using a comma. You can also add words to the Negative Prompt to tell it to try and ignore certain aspects.
Increasing the sampling steps tends to give better results, as can using a different sampling method. Lastly, the value of the CFG Scale tells SDWUI how much to ‘obey’ the prompts entered — the lower the value, the more liberal its interpretation of the instructions will be. So let’s have another go and see if we can do better.
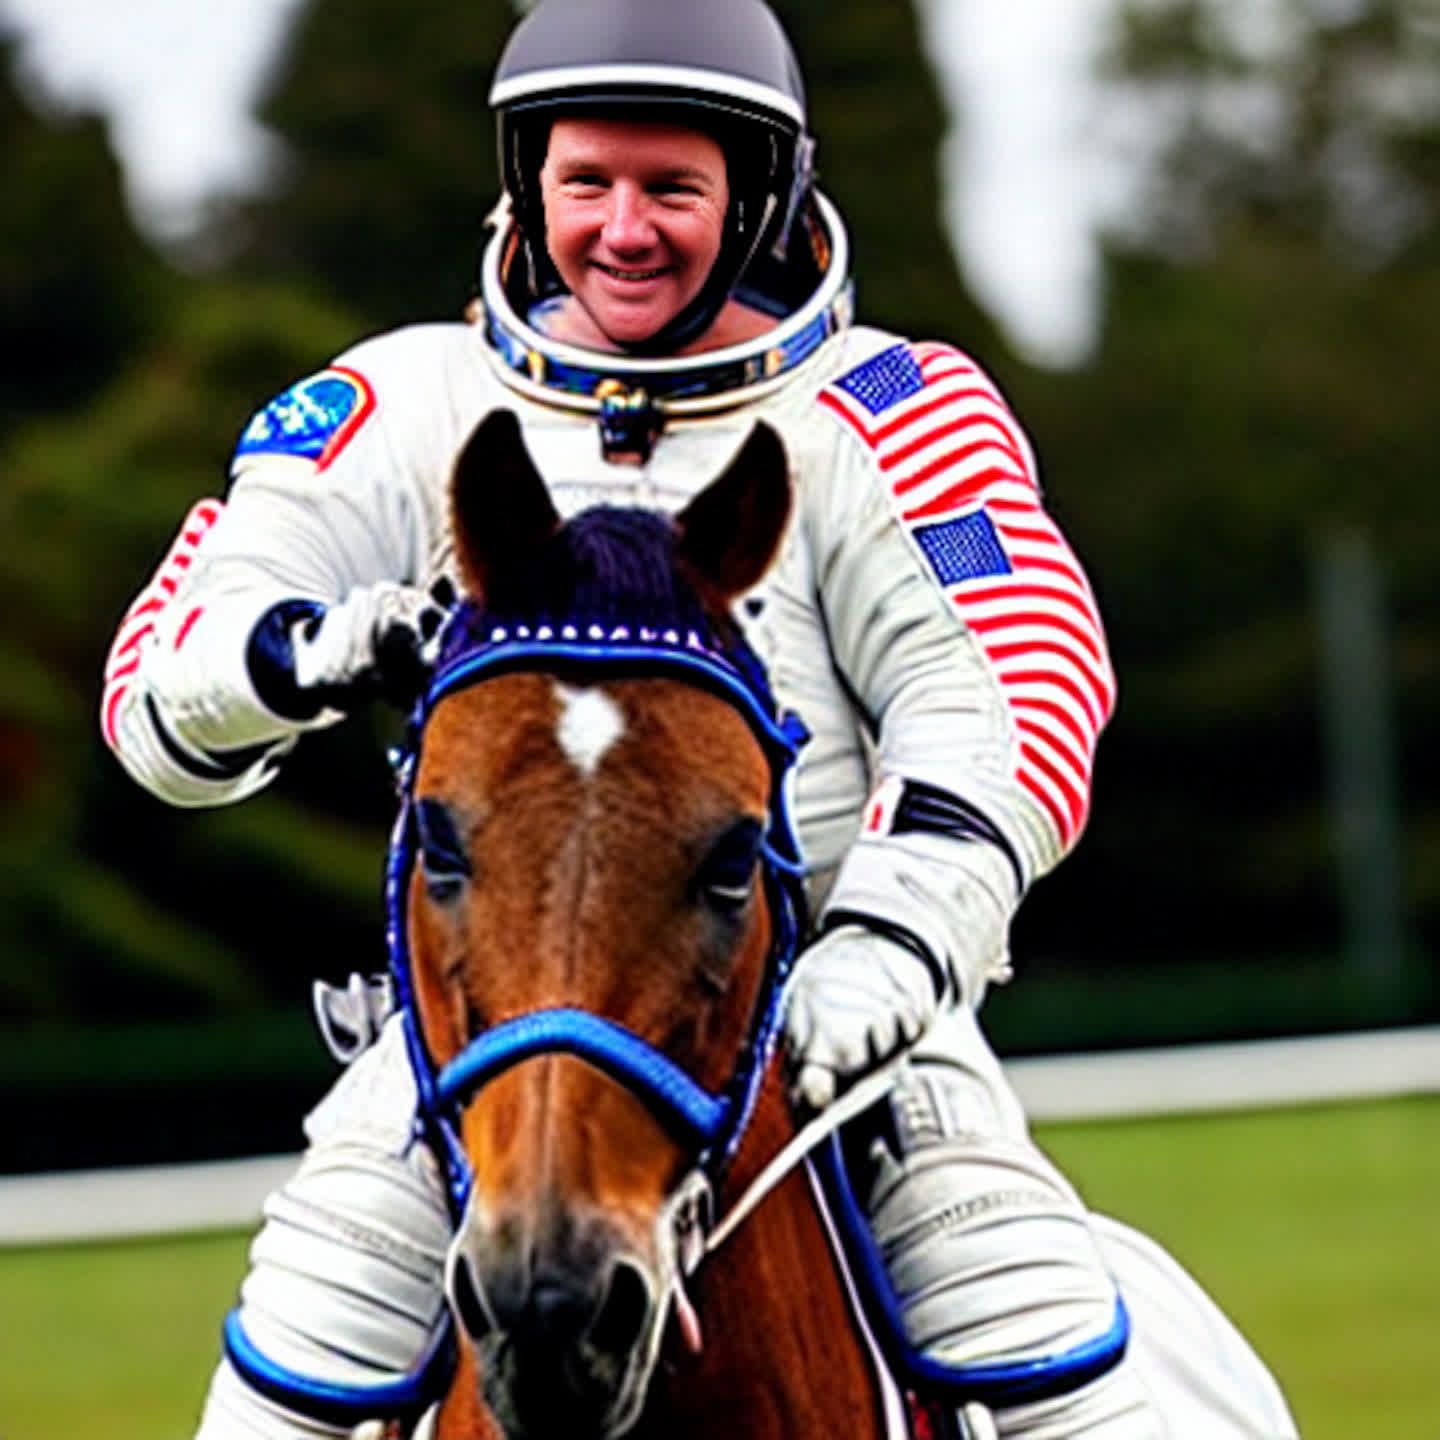
This time, our prompt words were ‘astronaut on a horse, nasa, realistic‘ and we added ‘painting, cartoon, surreal‘ to the negative prompt field; we also increased the sampling steps to 40, used the DDIM method, and raised the CFG scale to 9…
It’s arguably a lot better now, but still far from being perfect. The horse’s legs and the astronaut’s hands don’t look right, for a start. But with further experimentation using prompt and negative prompt words, as well as the number of steps and scale value, you can eventually reach something that you’re happy with.
The Restore Faces option helps to improve the quality of any human faces you’re expecting to see in the output, and enabling Highres Fix gives you access to further controls, such as the amount of denoising that gets applied. With a few more prompts and some additional tweaks, we present you with our finest creation.
Using a different seed can also help get you the image you’re after, so experiment away!
Stable Diffusion can be used to create all kinds of themes and art styles, from fantasy landscapes and vibrant city scenes to realistic animals and comical impressions.
With multiple models to download and explore, there’s a wealth of content that can be created and while it can be argued that the use of Stable Diffusion isn’t the same as actual art or media creation, it can be a lot of fun to play with.
Impressive “Creations”: It’s all about the input text
So you say, I have finally perfected this astronaut and no good prompts come to mind about generating something that looks as good as the illustrations circulating online. Turns out, we were able to create much better images once we understood how important (and detailed) the text input was.
Tip: In SDWUI, there is a paint palette icon right next to the generate button that will input random artists names. Play around with this to create different takes and styles of the same prompts.
Tip 2: There are already plenty of resources for prompts and galleries out there.
Here are some good examples found online and their corresponding prompts to give you an idea:
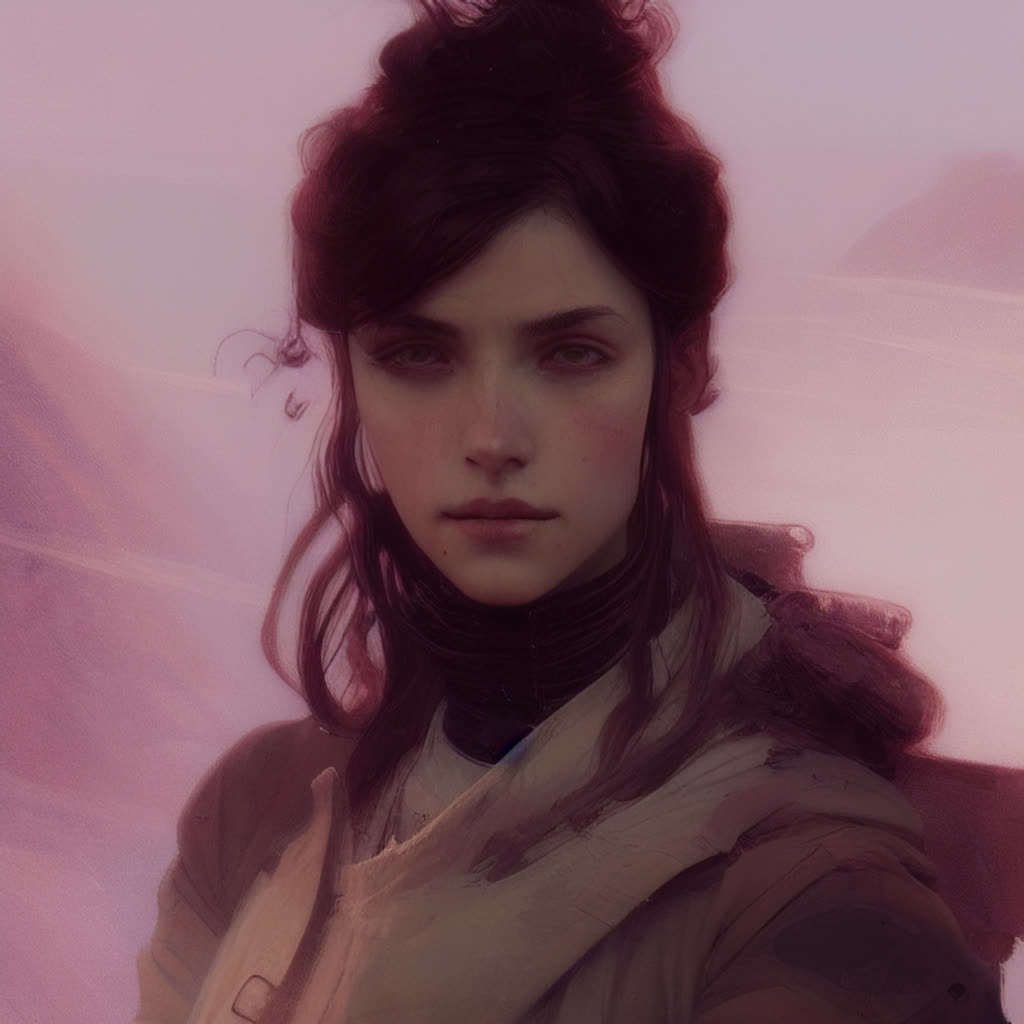
Beautiful post apocalyptic portrait
Prompt: A full portrait of a beautiful post apocalyptic offworld nanotechnician, intricate, elegant, highly detailed, digital painting, artstation, concept art, smooth, sharp focus, illustration, art by Krenz Cushart and Artem Demura and alphonse mucha
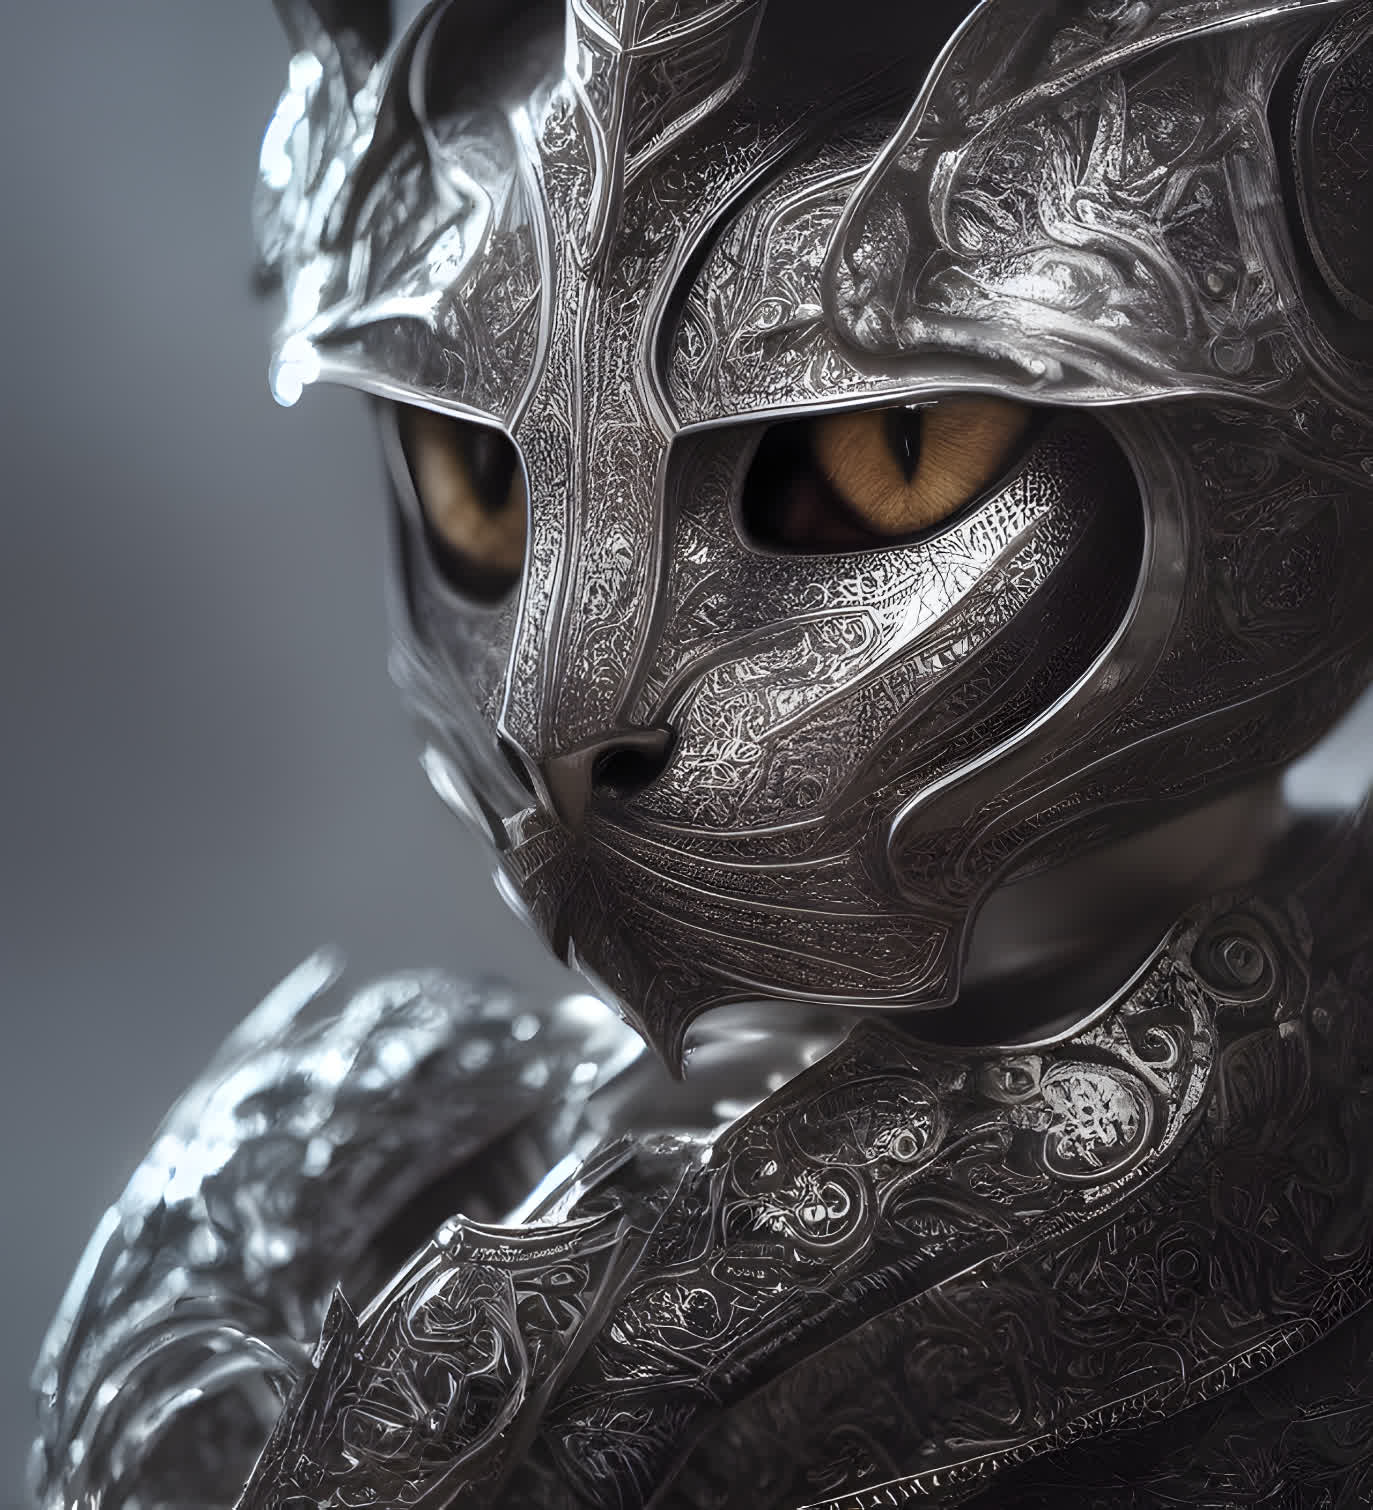
Cat Knight
Prompt (source): kneeling cat knight, portrait, finely detailed armor, intricate design, silver, silk, cinematic lighting, 4k
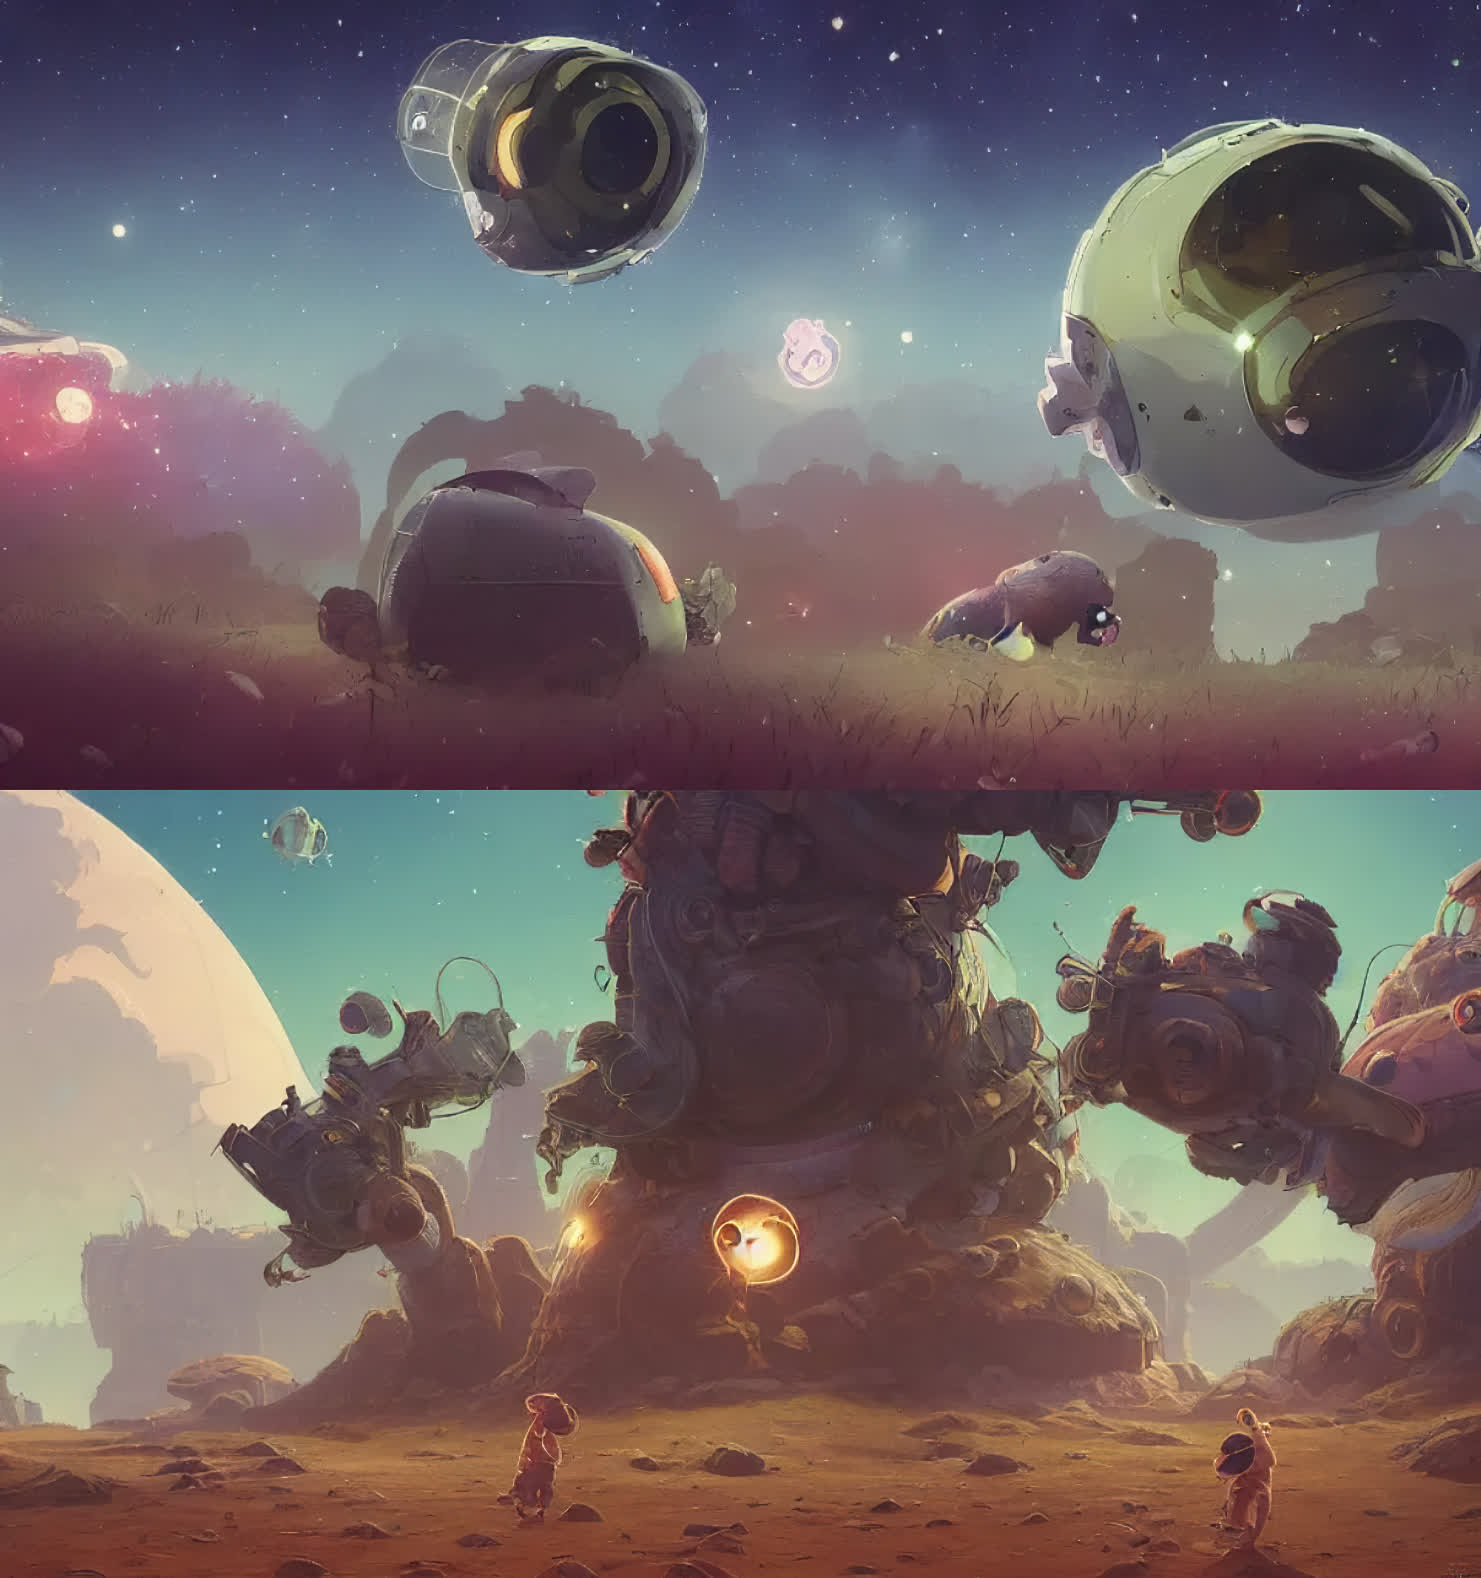
Space Fantasy
Prompt (source): Guineapig’s ultra realistic detailed floating in universe suits floating in space, nubela, warmhole, beautiful stars, 4 k, 8 k, by simon stalenhag, frank frazetta, greg rutkowski, beeple, yoko taro, christian macnevin, beeple, wlop and krenz cushart, epic fantasy character art, volumetric outdoor lighting, midday, high fantasy, cgsociety, cheerful colours, full length, exquisite detail, post @ – processing, masterpiece, cinematic
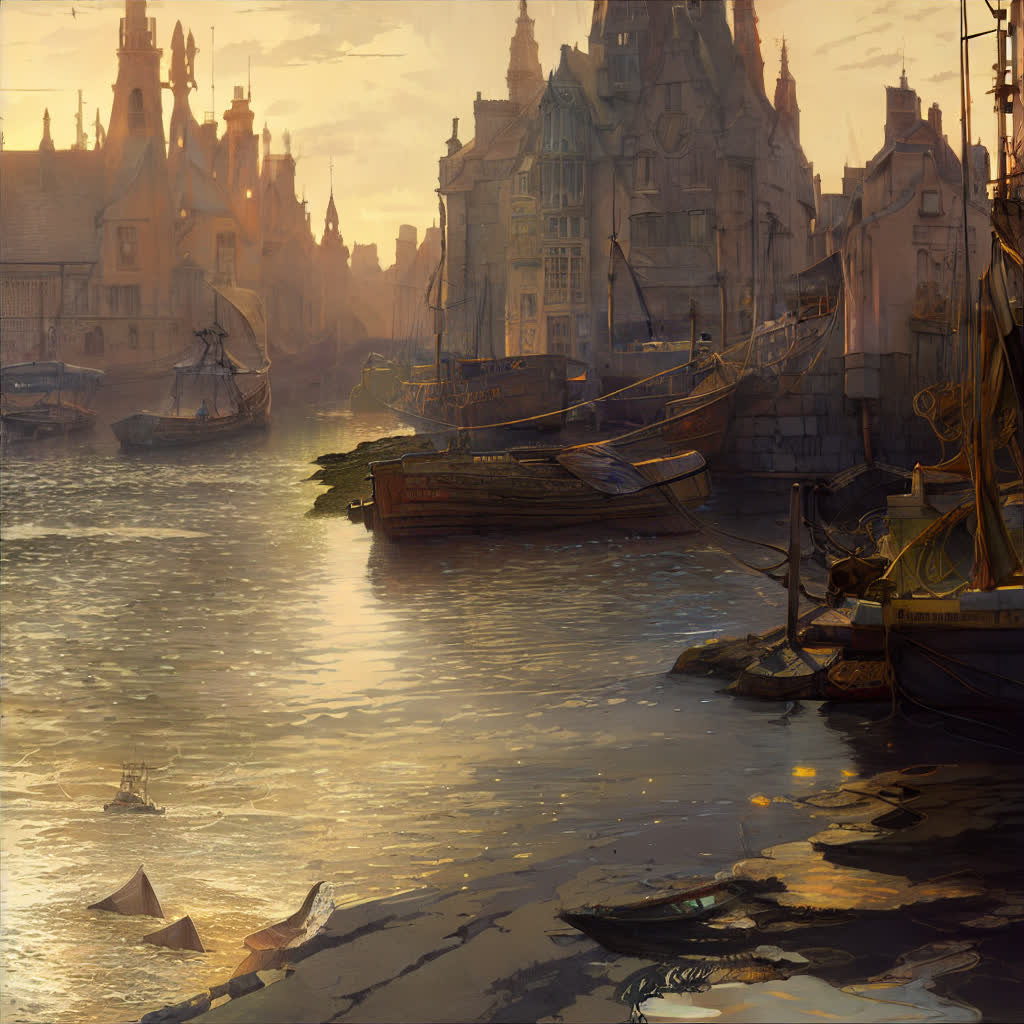
Old Harbour
Prompt (source): old harbour, tone mapped, shiny, intricate, cinematic lighting, highly detailed, digital painting, artstation, concept art, smooth, sharp focus, illustration, art by terry moore and greg rutkowski and alphonse mucha
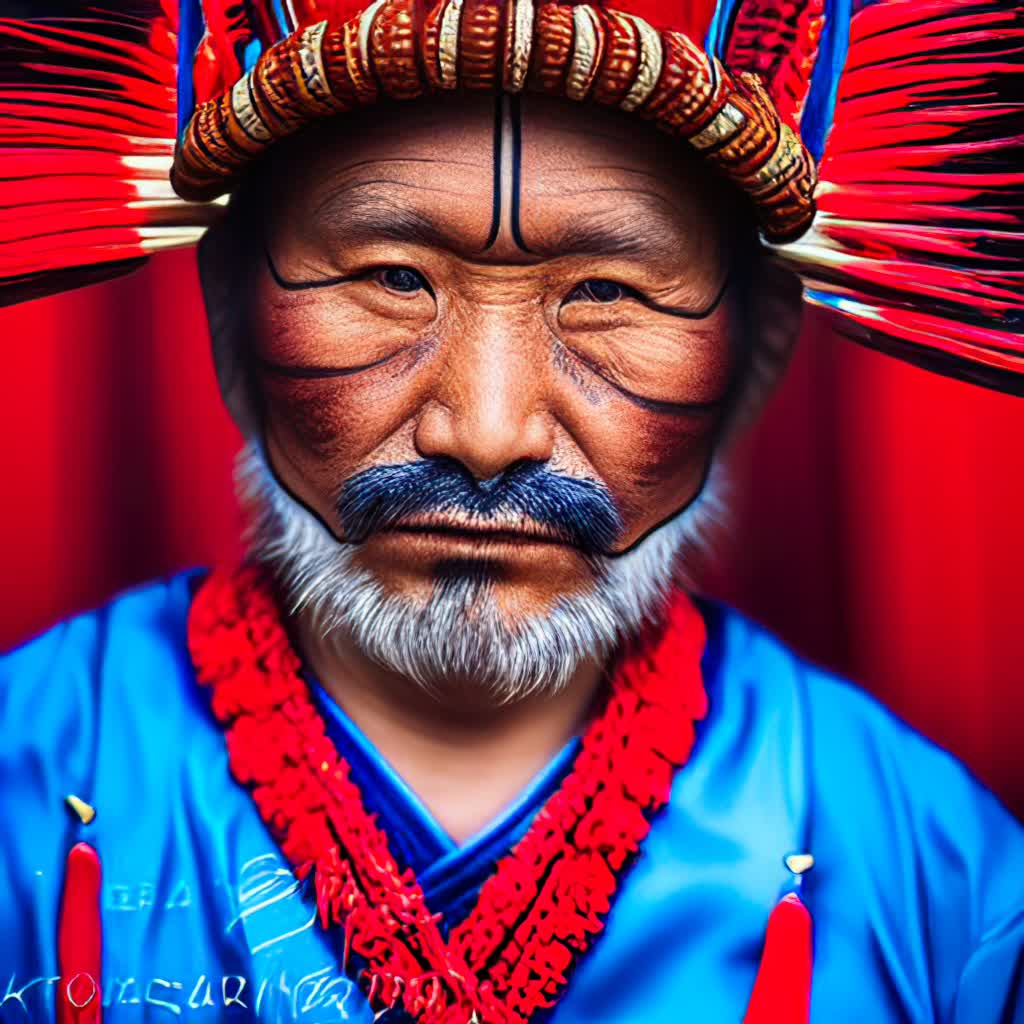
Asian warrior
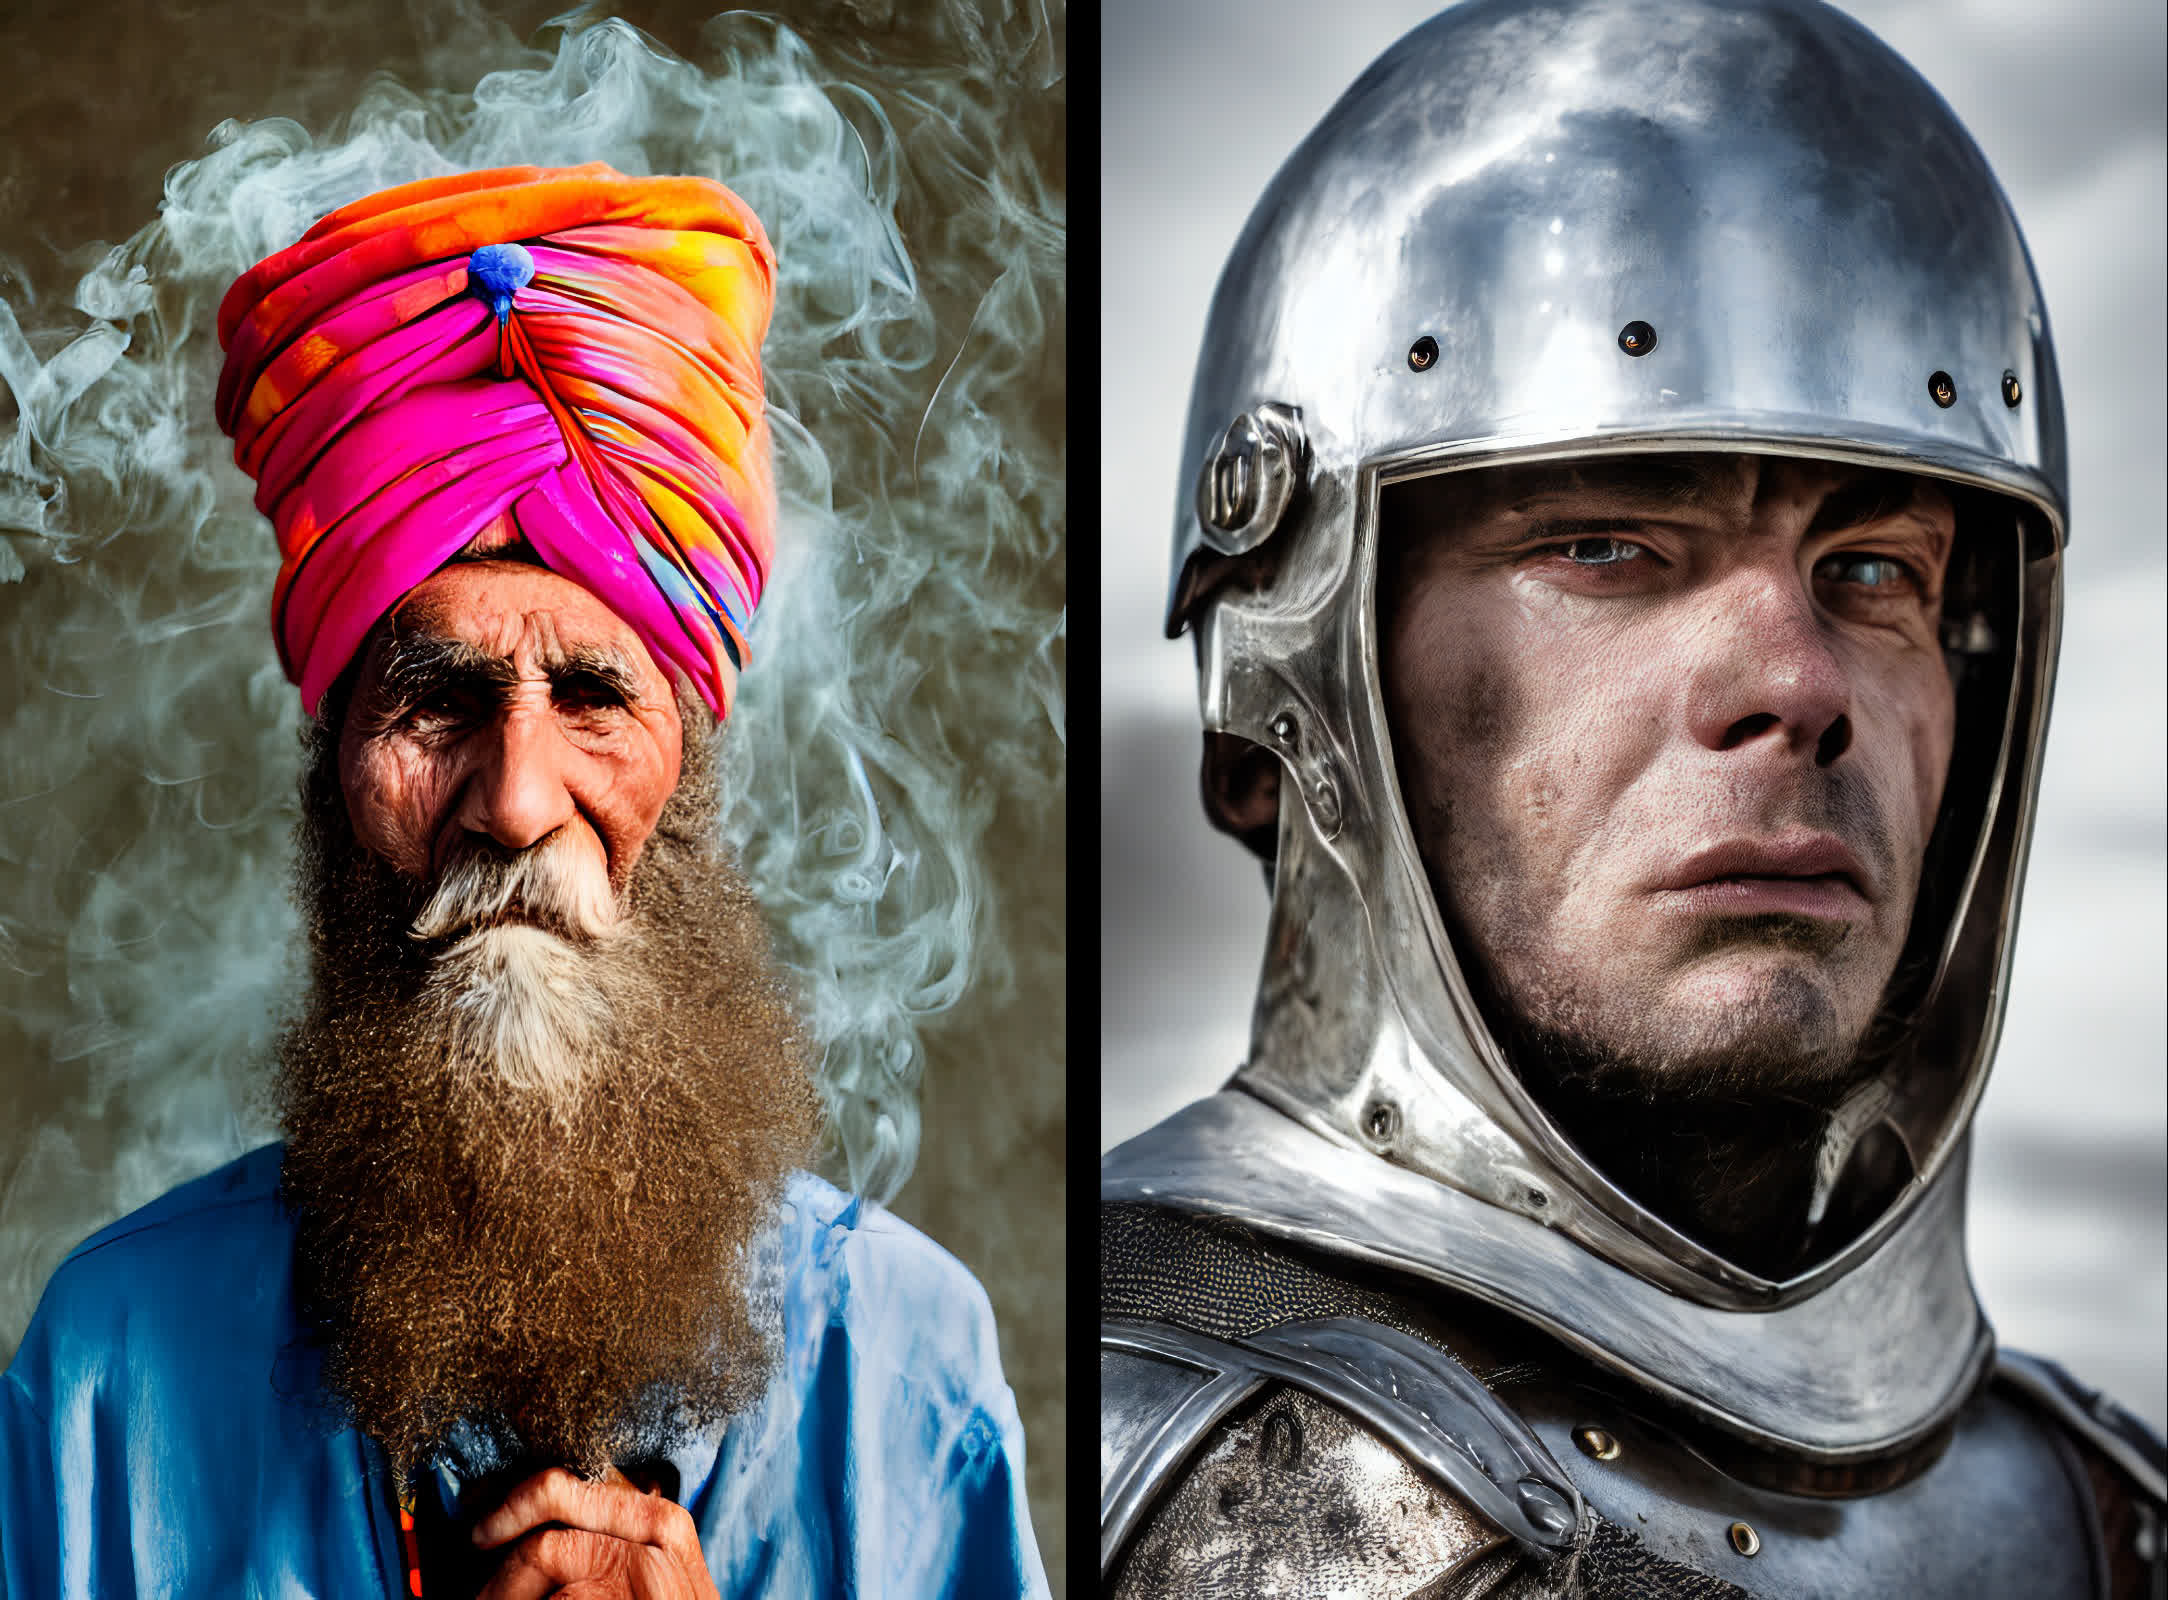
Prompt (source): portrait photo of a asia old warrior chief, tribal panther make up, blue on red, side profile, looking away, serious eyes, 50mm portrait photography, hard rim lighting photography–beta –ar 2:3 –beta –upbeta –upbeta
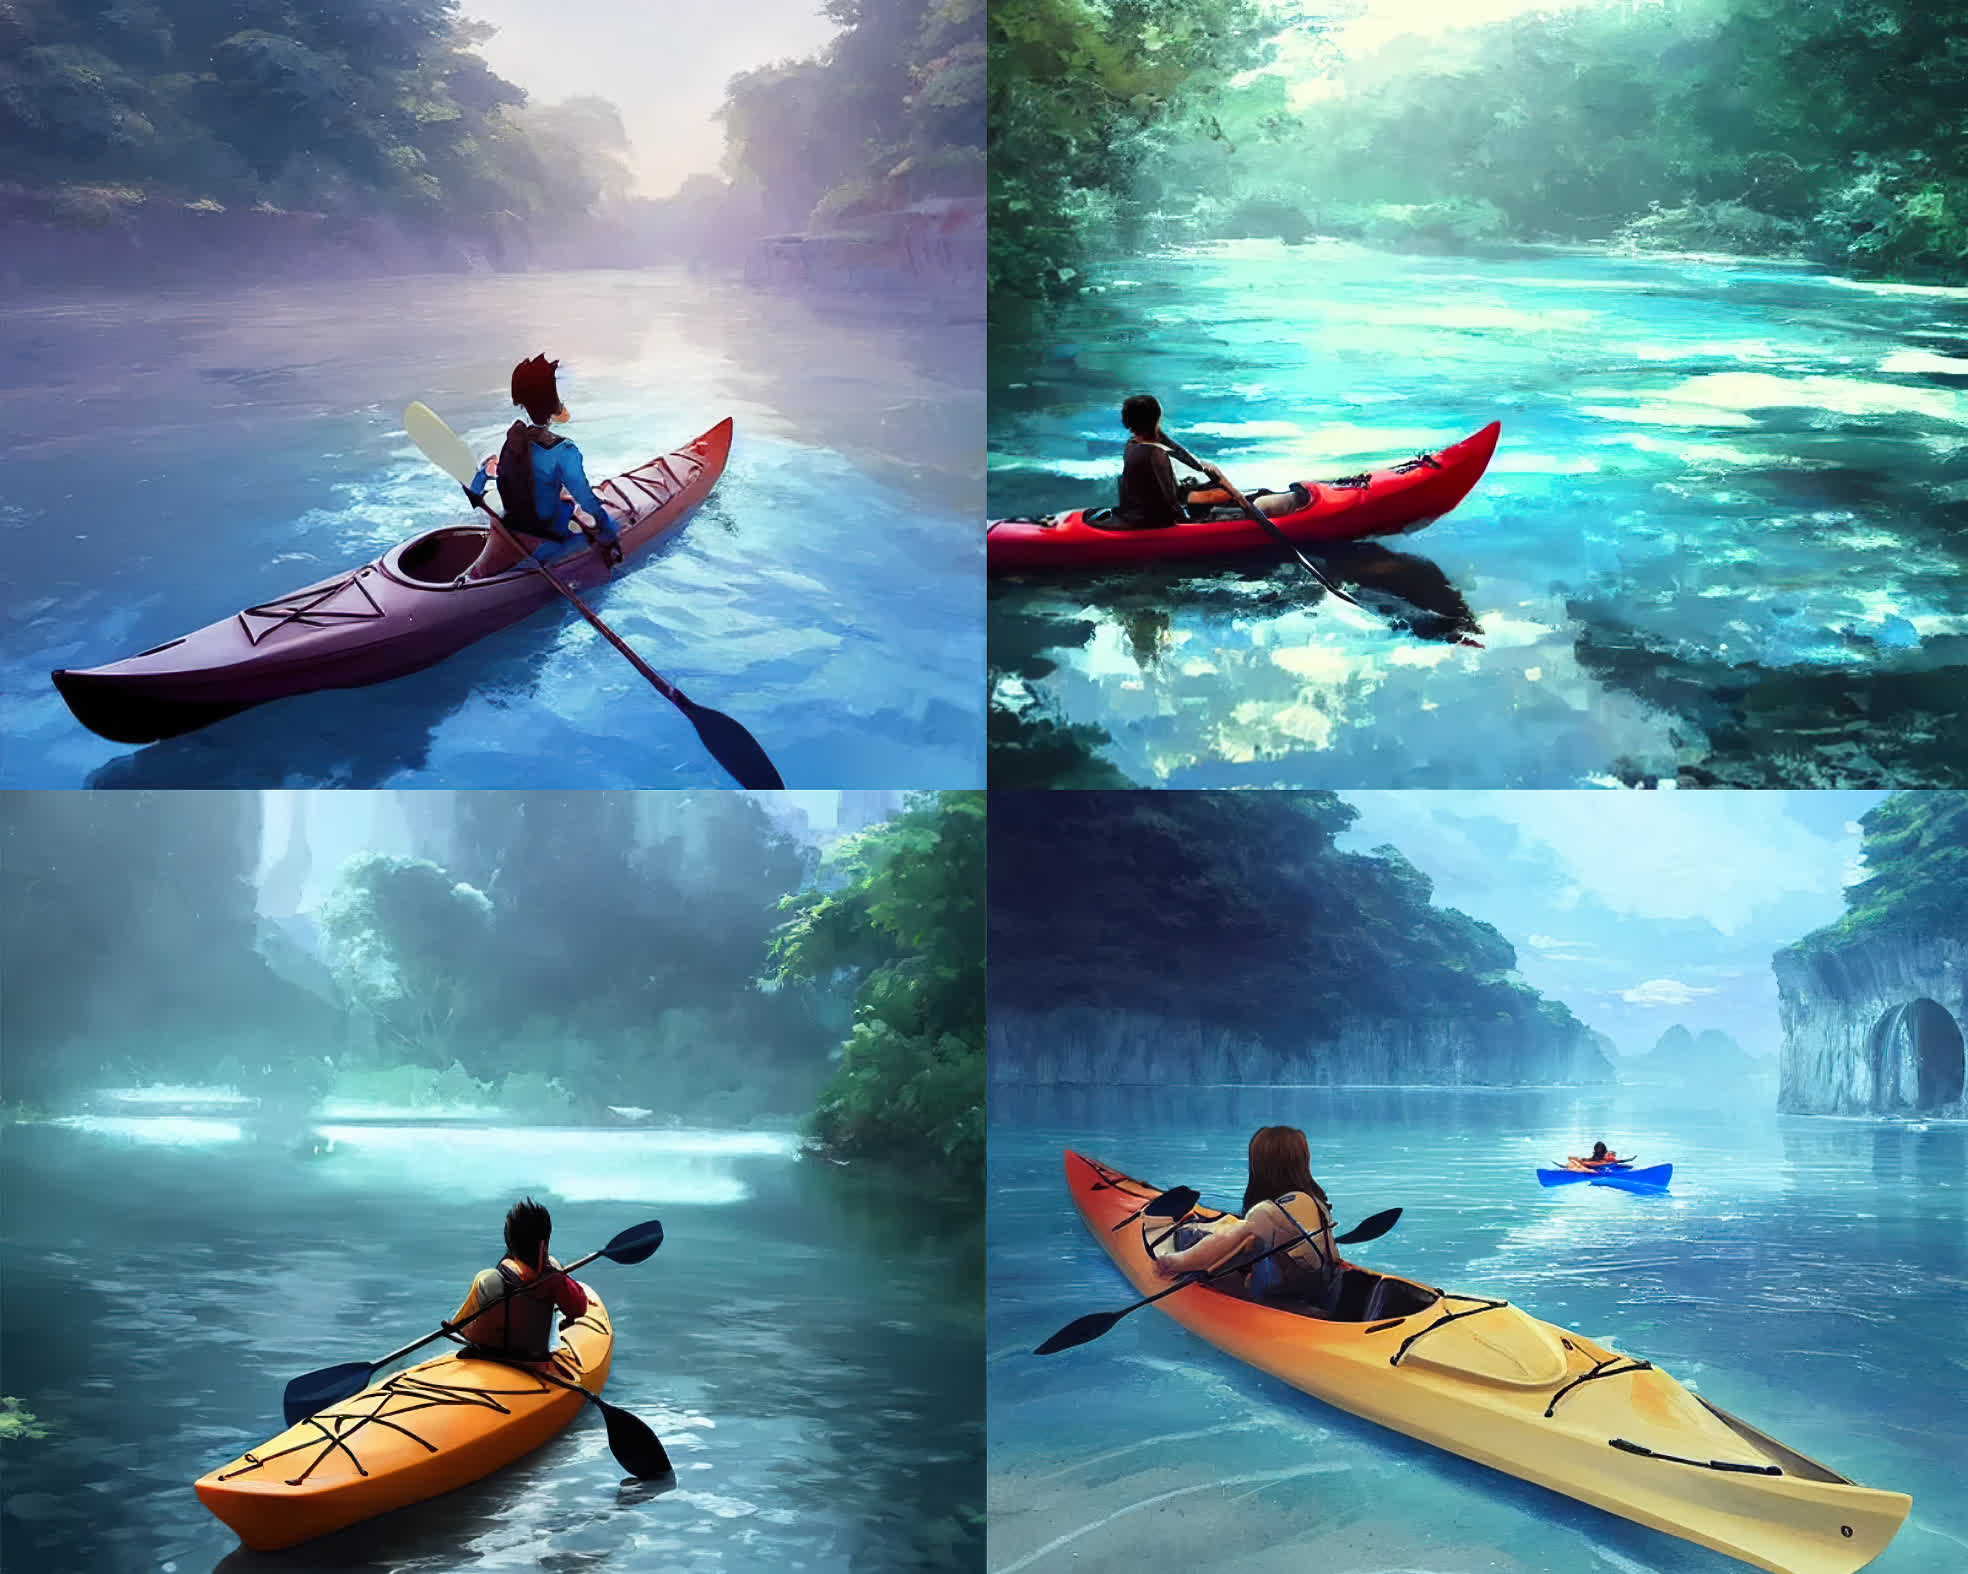
Kayaking
Prompt (source): A kayak in a river. blue water, atmospheric lighting. by makoto shinkai, stanley artgerm lau, wlop, rossdraws, james jean, andrei riabovitchev, marc simonetti, krenz cushart, sakimichan, d & d trending on artstation, digital art.
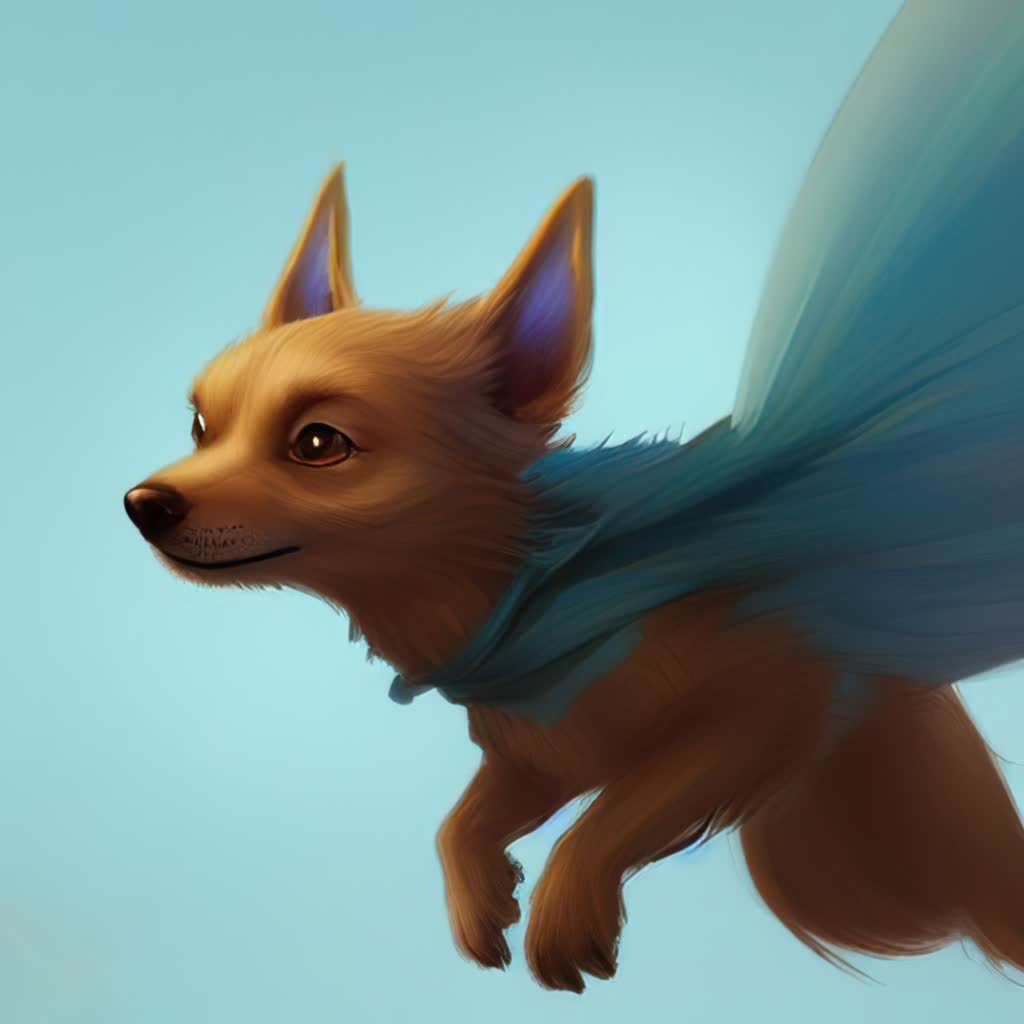
Magical flying dog
Prompt (source): a cute magical flying dog, fantasy art drawn by disney concept artists, golden colour, high quality, highly detailed, elegant, sharp focus, concept art, character concepts, digital painting, mystery, adventure
Upscaling with Stable Diffusion: Bigger is better but not always easy
So what else can you do with Stable Diffusion? Other than having fun making pictures from words, it can also be used to upscale pictures to a higher resolution, restore or fix images by removing unwanted areas, and even extend a picture beyond its original frame borders.
By switching to the img2img tab in SDWUI, we can use the AI algorithm to upscale a low-resolution image.
The training models were primarily developed using very small pictures, with 1:1 aspect ratios, so if you’re planning on upscaling something that’s 1920 x 1080 in size, for example, then you might think you’re out of luck.
Fortunately, SDWUI has a solution for you. At the bottom of the img2img tab, there is a Script drop-down menu where you can select SD Upscale. This script will break the image up into multiple 512 x 512 tiles and use another AI algorithm (e.g. ESRGAN) to upscale them. The program then uses Stable Diffusion to improve the results of the larger tiles, before stitching everything back into a single image.
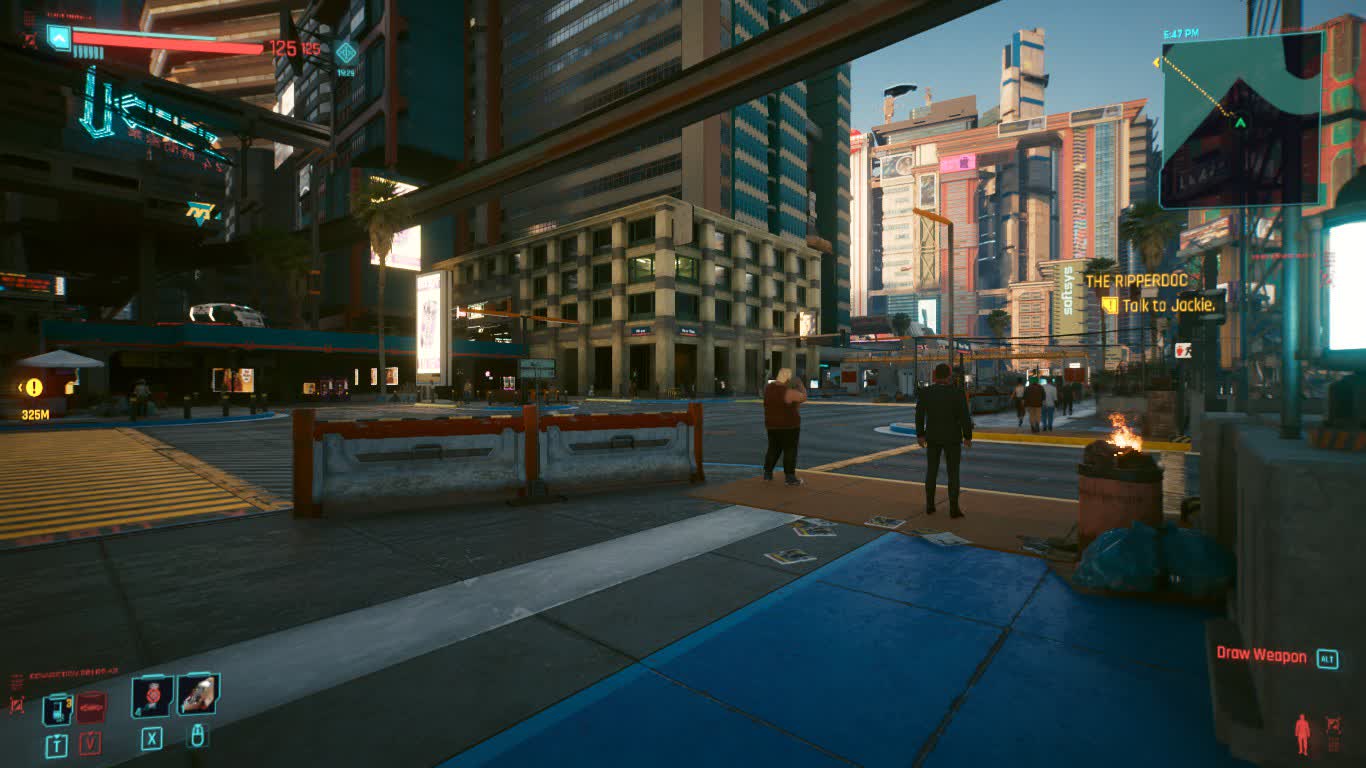
Here’s a screenshot taken from Cyberpunk 2077, with a 1366×768 in-game resolution. As you can see, it doesn’t look super bad, but the text is somewhat hard to read, so let’s run it through the process using ESRGAN_4x to upscale each tile, followed by Stable Diffusion processing to tidy them up.
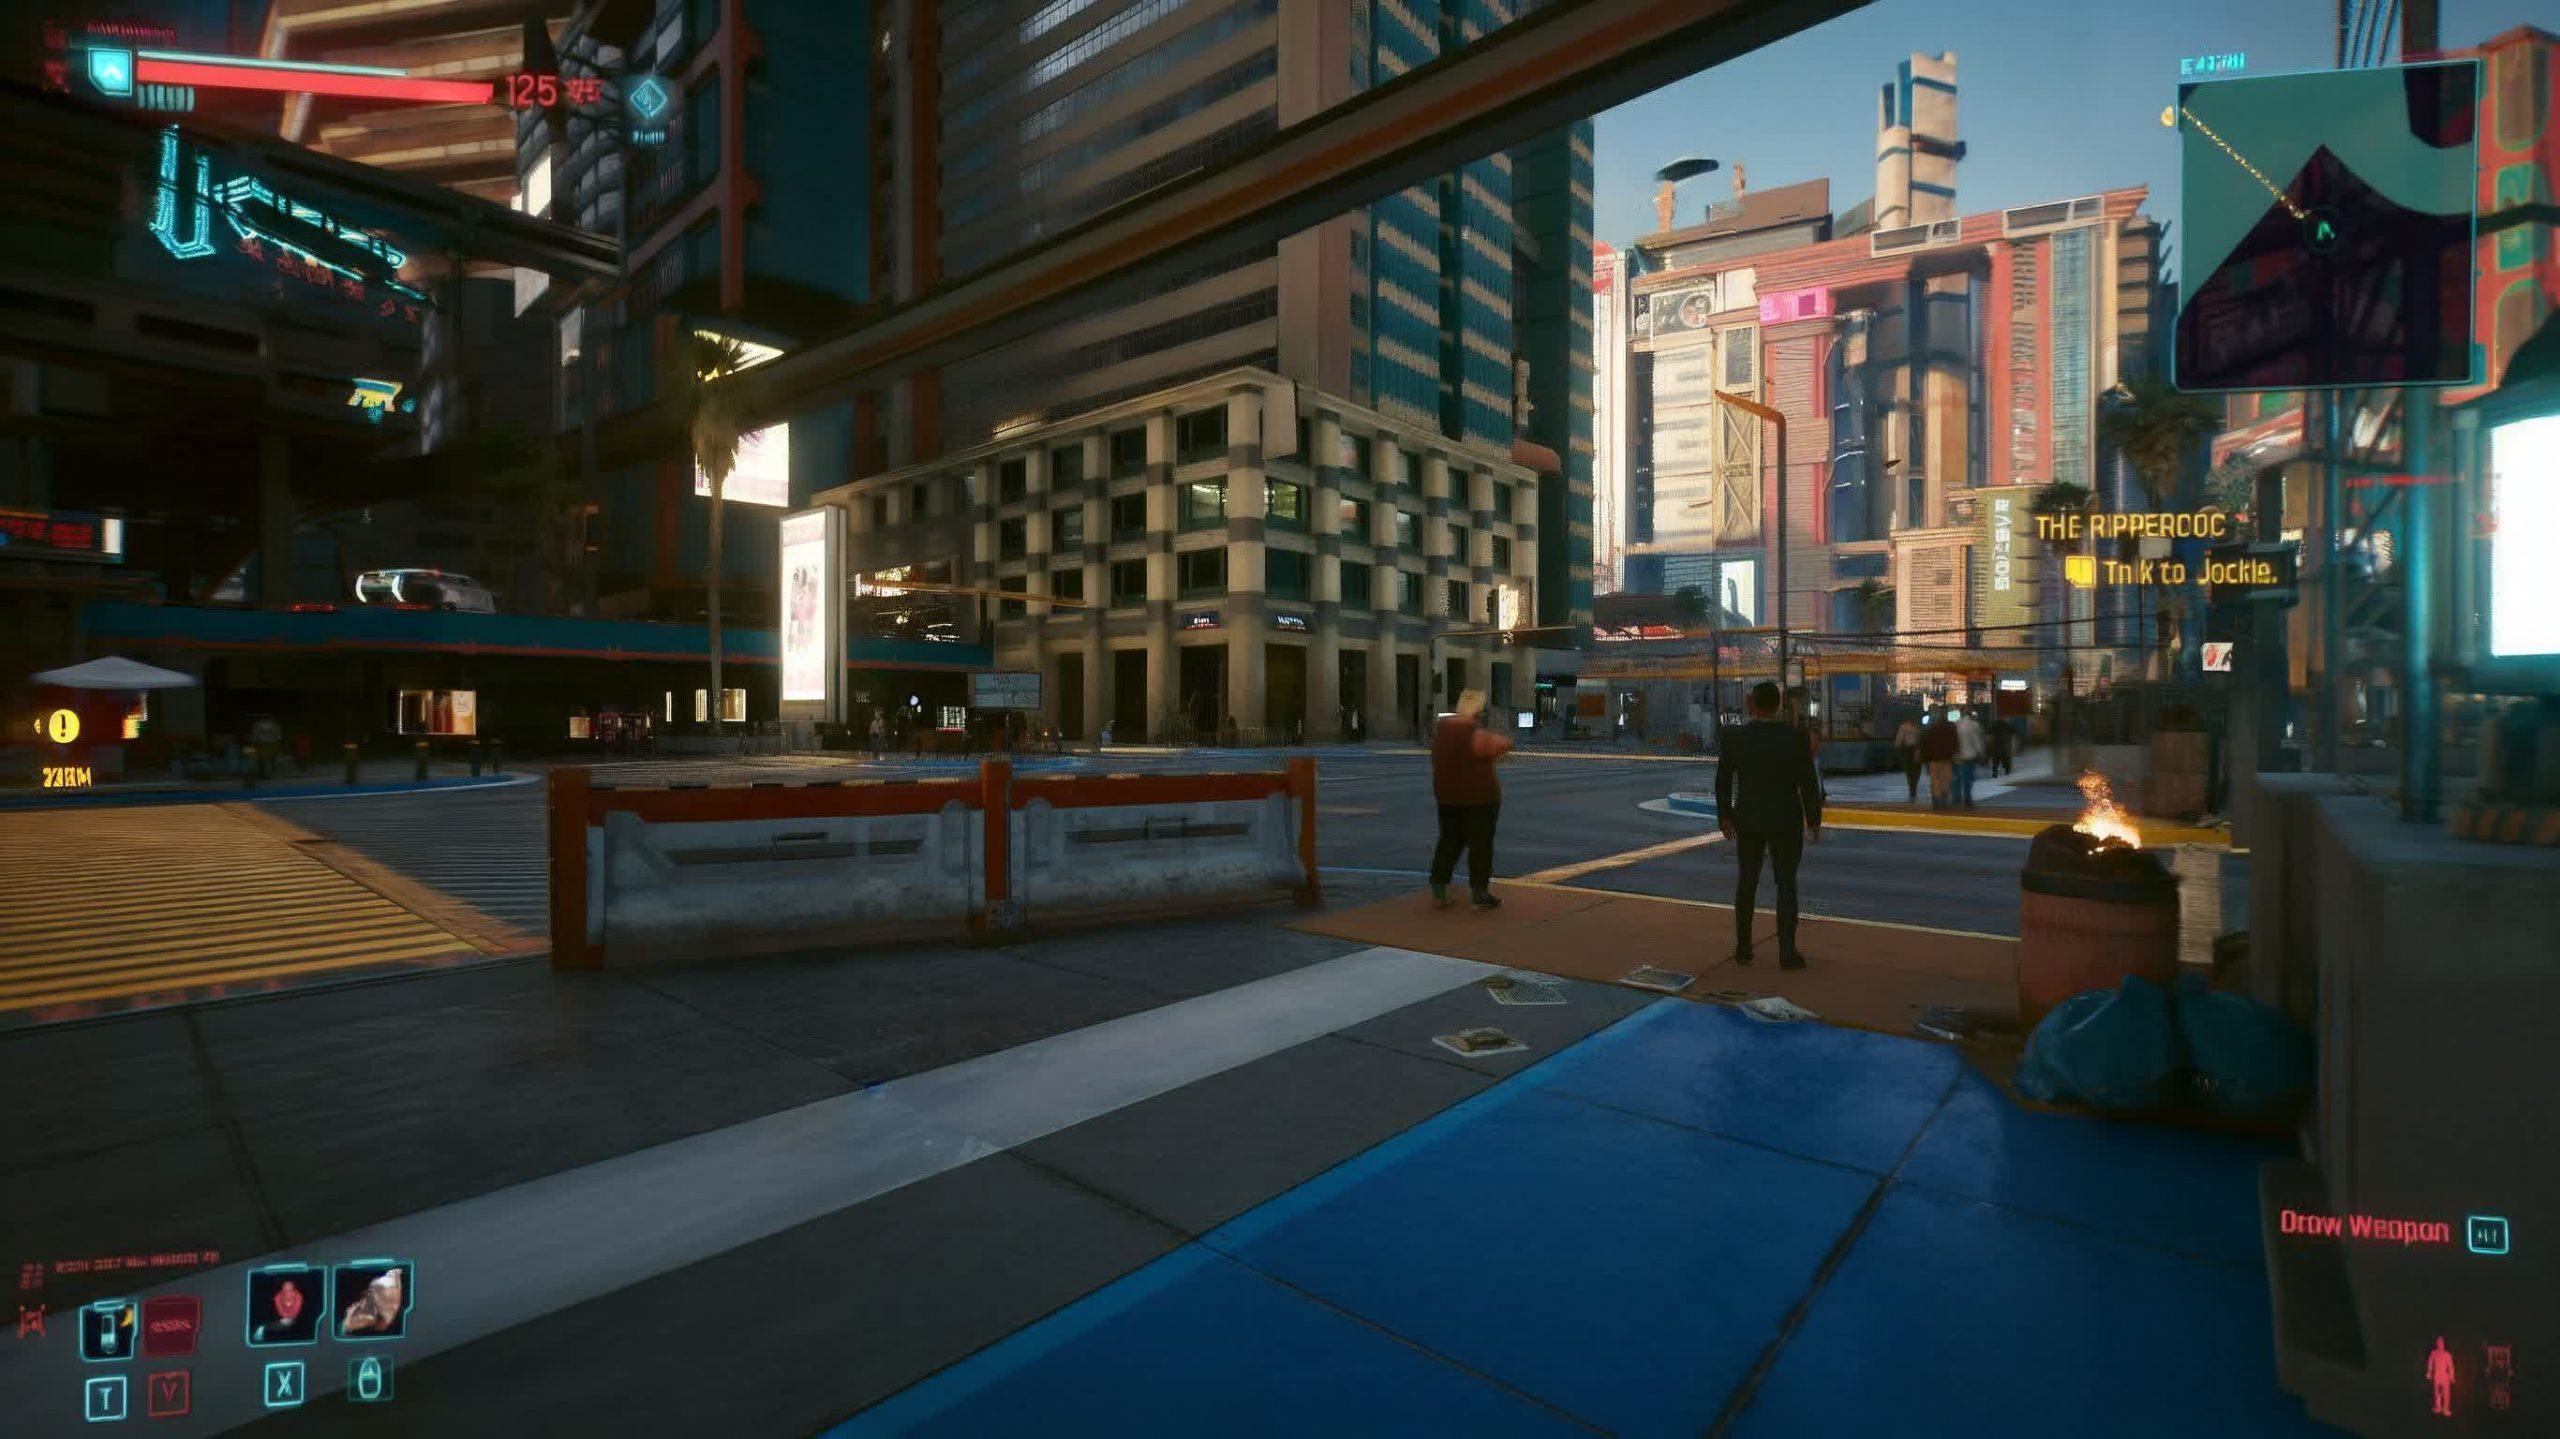
We used 80 sampling steps, the Euler-a sampling method, 512 x 512 tiles with an overlap of 32 pixels, and a denoising scale of 0.1 as so not to remove too much fine detail.
It’s not a great result, unfortunately, as many textures have been blurred or darkened. The biggest issue is the impact on the text elements in the original image, as they’re clearly worse after all that neural network number crunching.
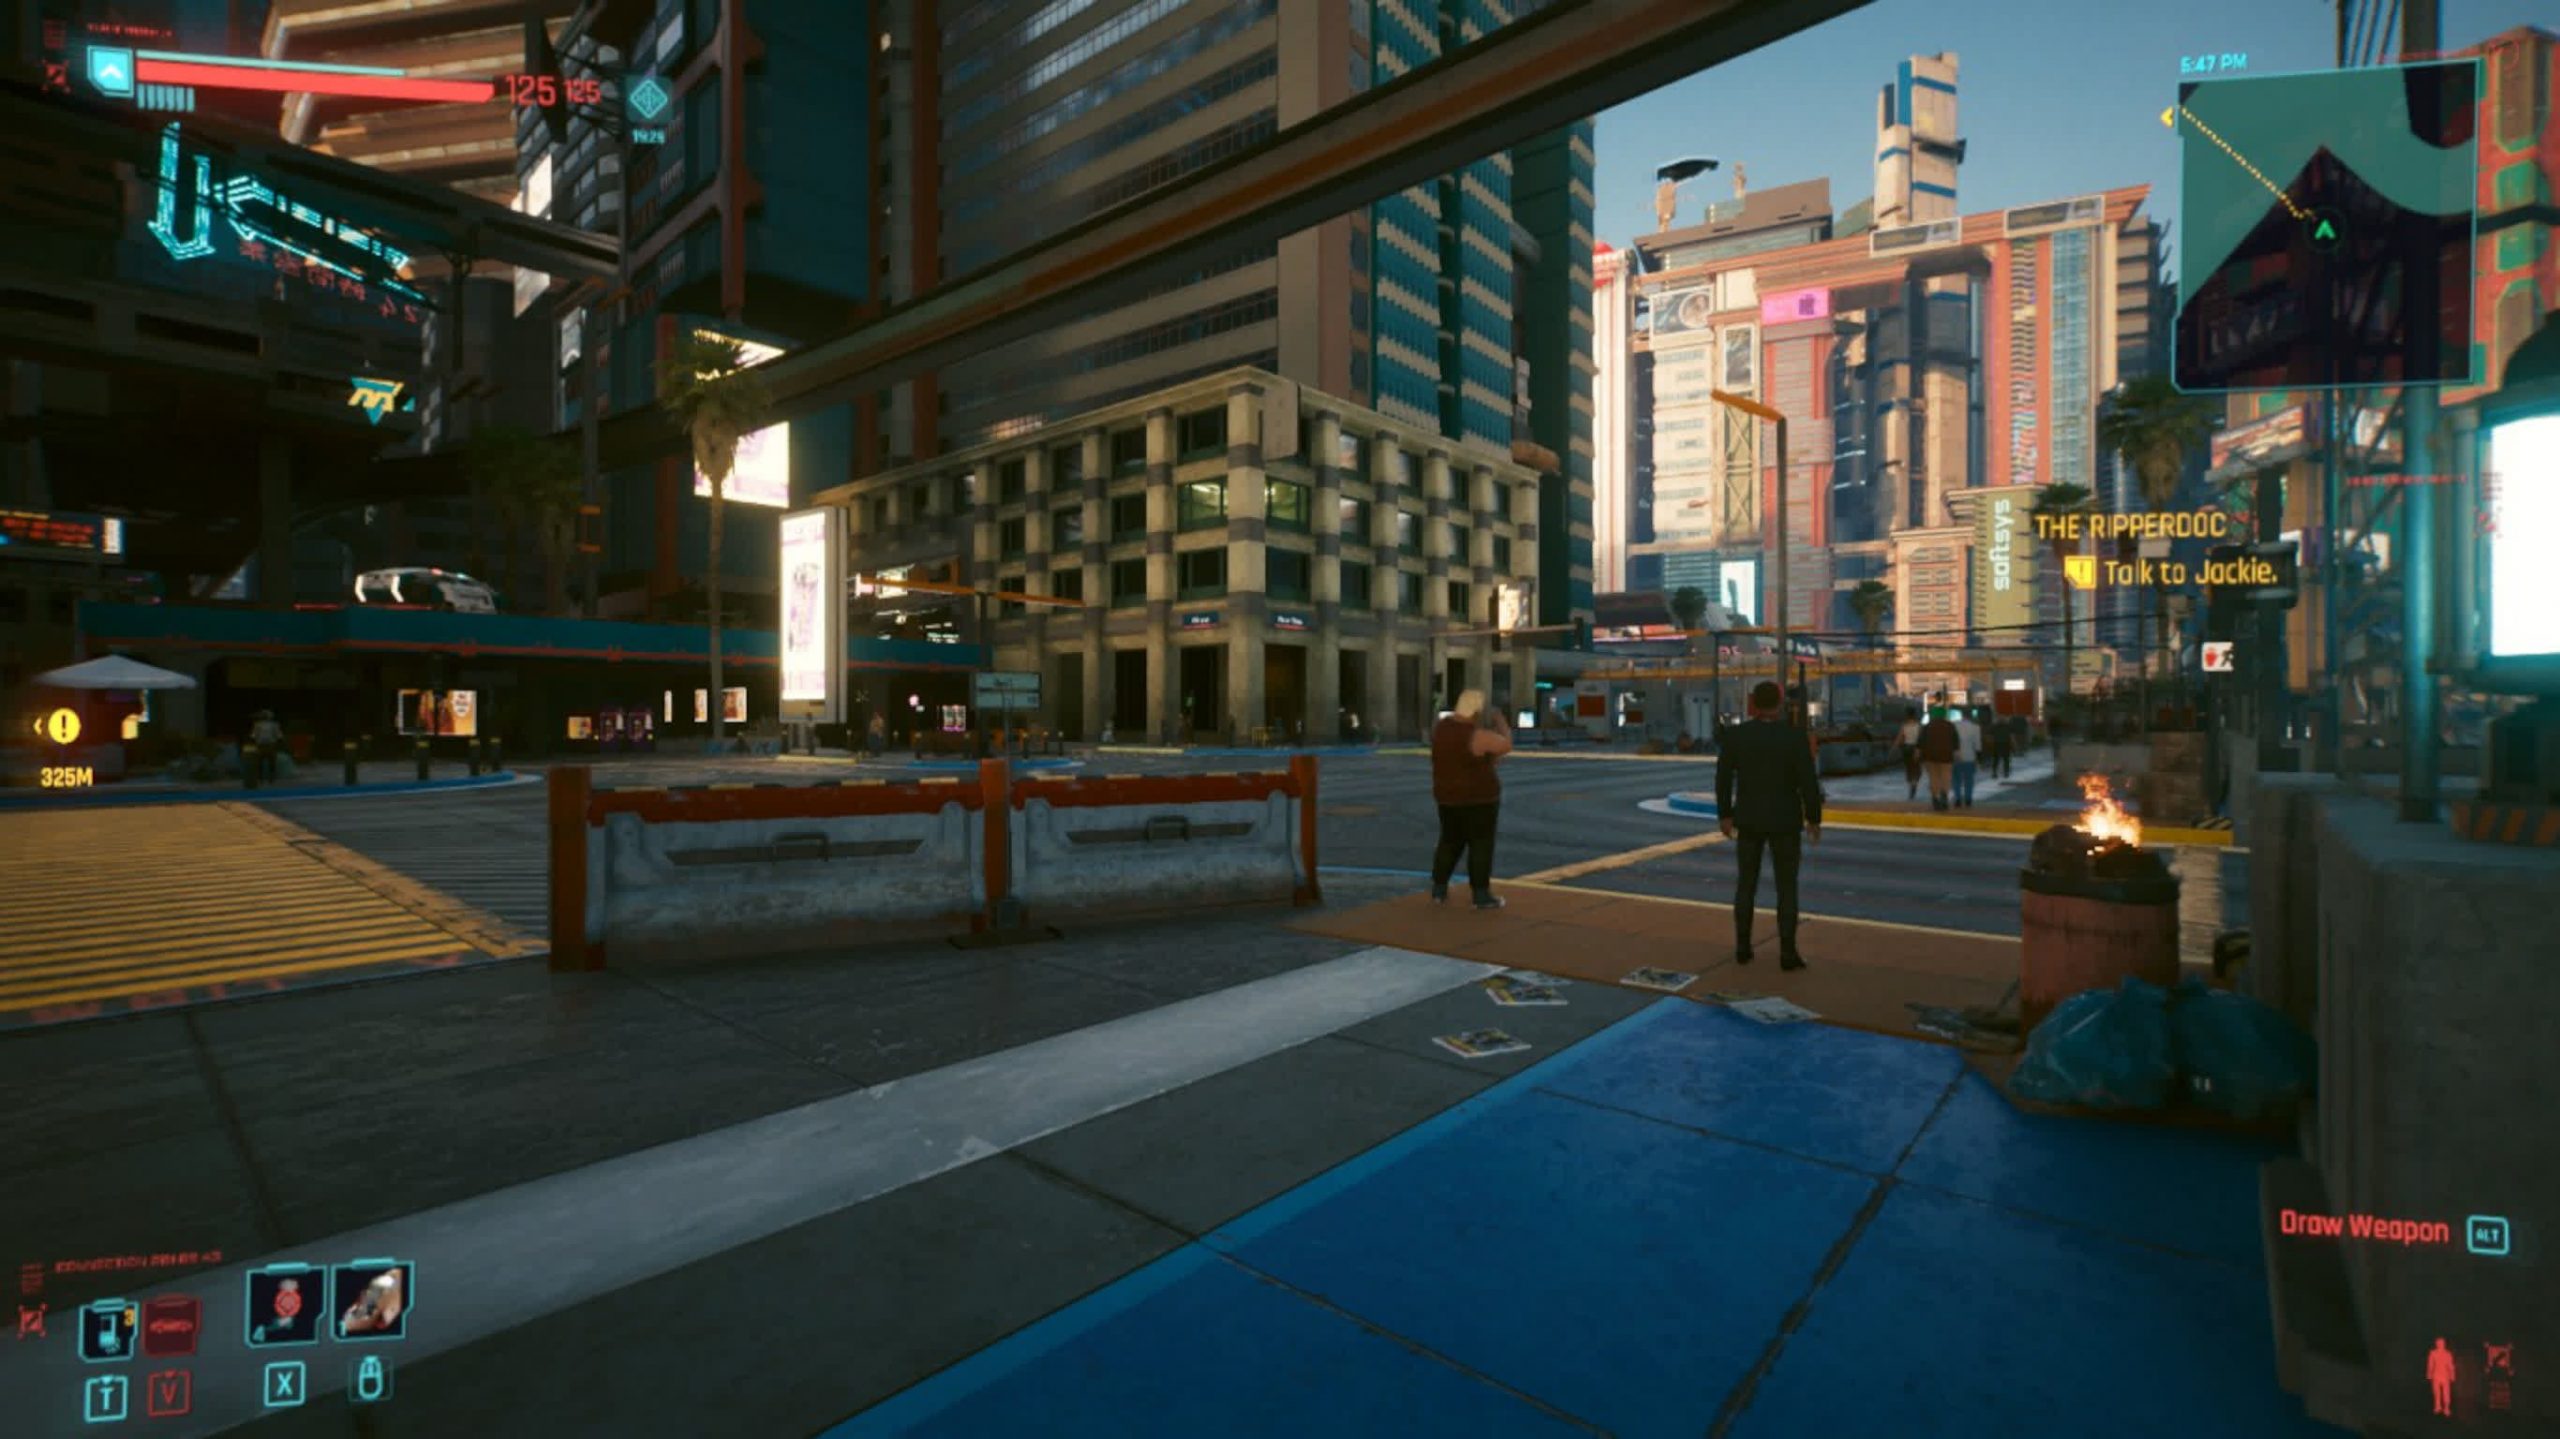
If we use an image editing program like GIMP to upscale (using the default bicubic interpolation) the original screenshot by a factor of 2, we can easily see just how effective the AI method has been.
Yes, everything is now blurry, but at least you can easily pick out all of the digits and letters displayed. But we’re being somewhat unfair to SDWUI here, as it takes time and multiple runs to find the perfect settings — there’s no quick solution to this, unfortunately.
Another aspect that the system is struggling with is the fact that picture contains multiple visual elements: text, numbers, sky, buildings, people, and so on. While the AI model was trained on billions of images, relatively few of them will be exactly like this screenshot.
So let’s try a different image, something that contains few elements. We’ve taken a low-resolution (320 x 200) photo of a cat and below are two 4x upscales — the left was done in GIMP, with no interpolation used, and on the right, is the result of 150 sampling steps, Euler-a, 128 pixel overlap, and a very low denoising value.
While the AI-upscaled image appears a tad more pixelated than the other picture, especially around the ears; the lower part of the next isn’t too great either. But with more time, and further experimentation of the dozens of parameters SDWUI offers for running the algorithm, better results could be achieved. You can also try a different SD model, such as x4-upscaling-ema, which should give superior results when aiming for very large final images.
Removing/adding elements: Say hello, wave goodbye
Two more tricks you can do with Stable Diffusion are inpainting and outpainting — let’s start with the former.
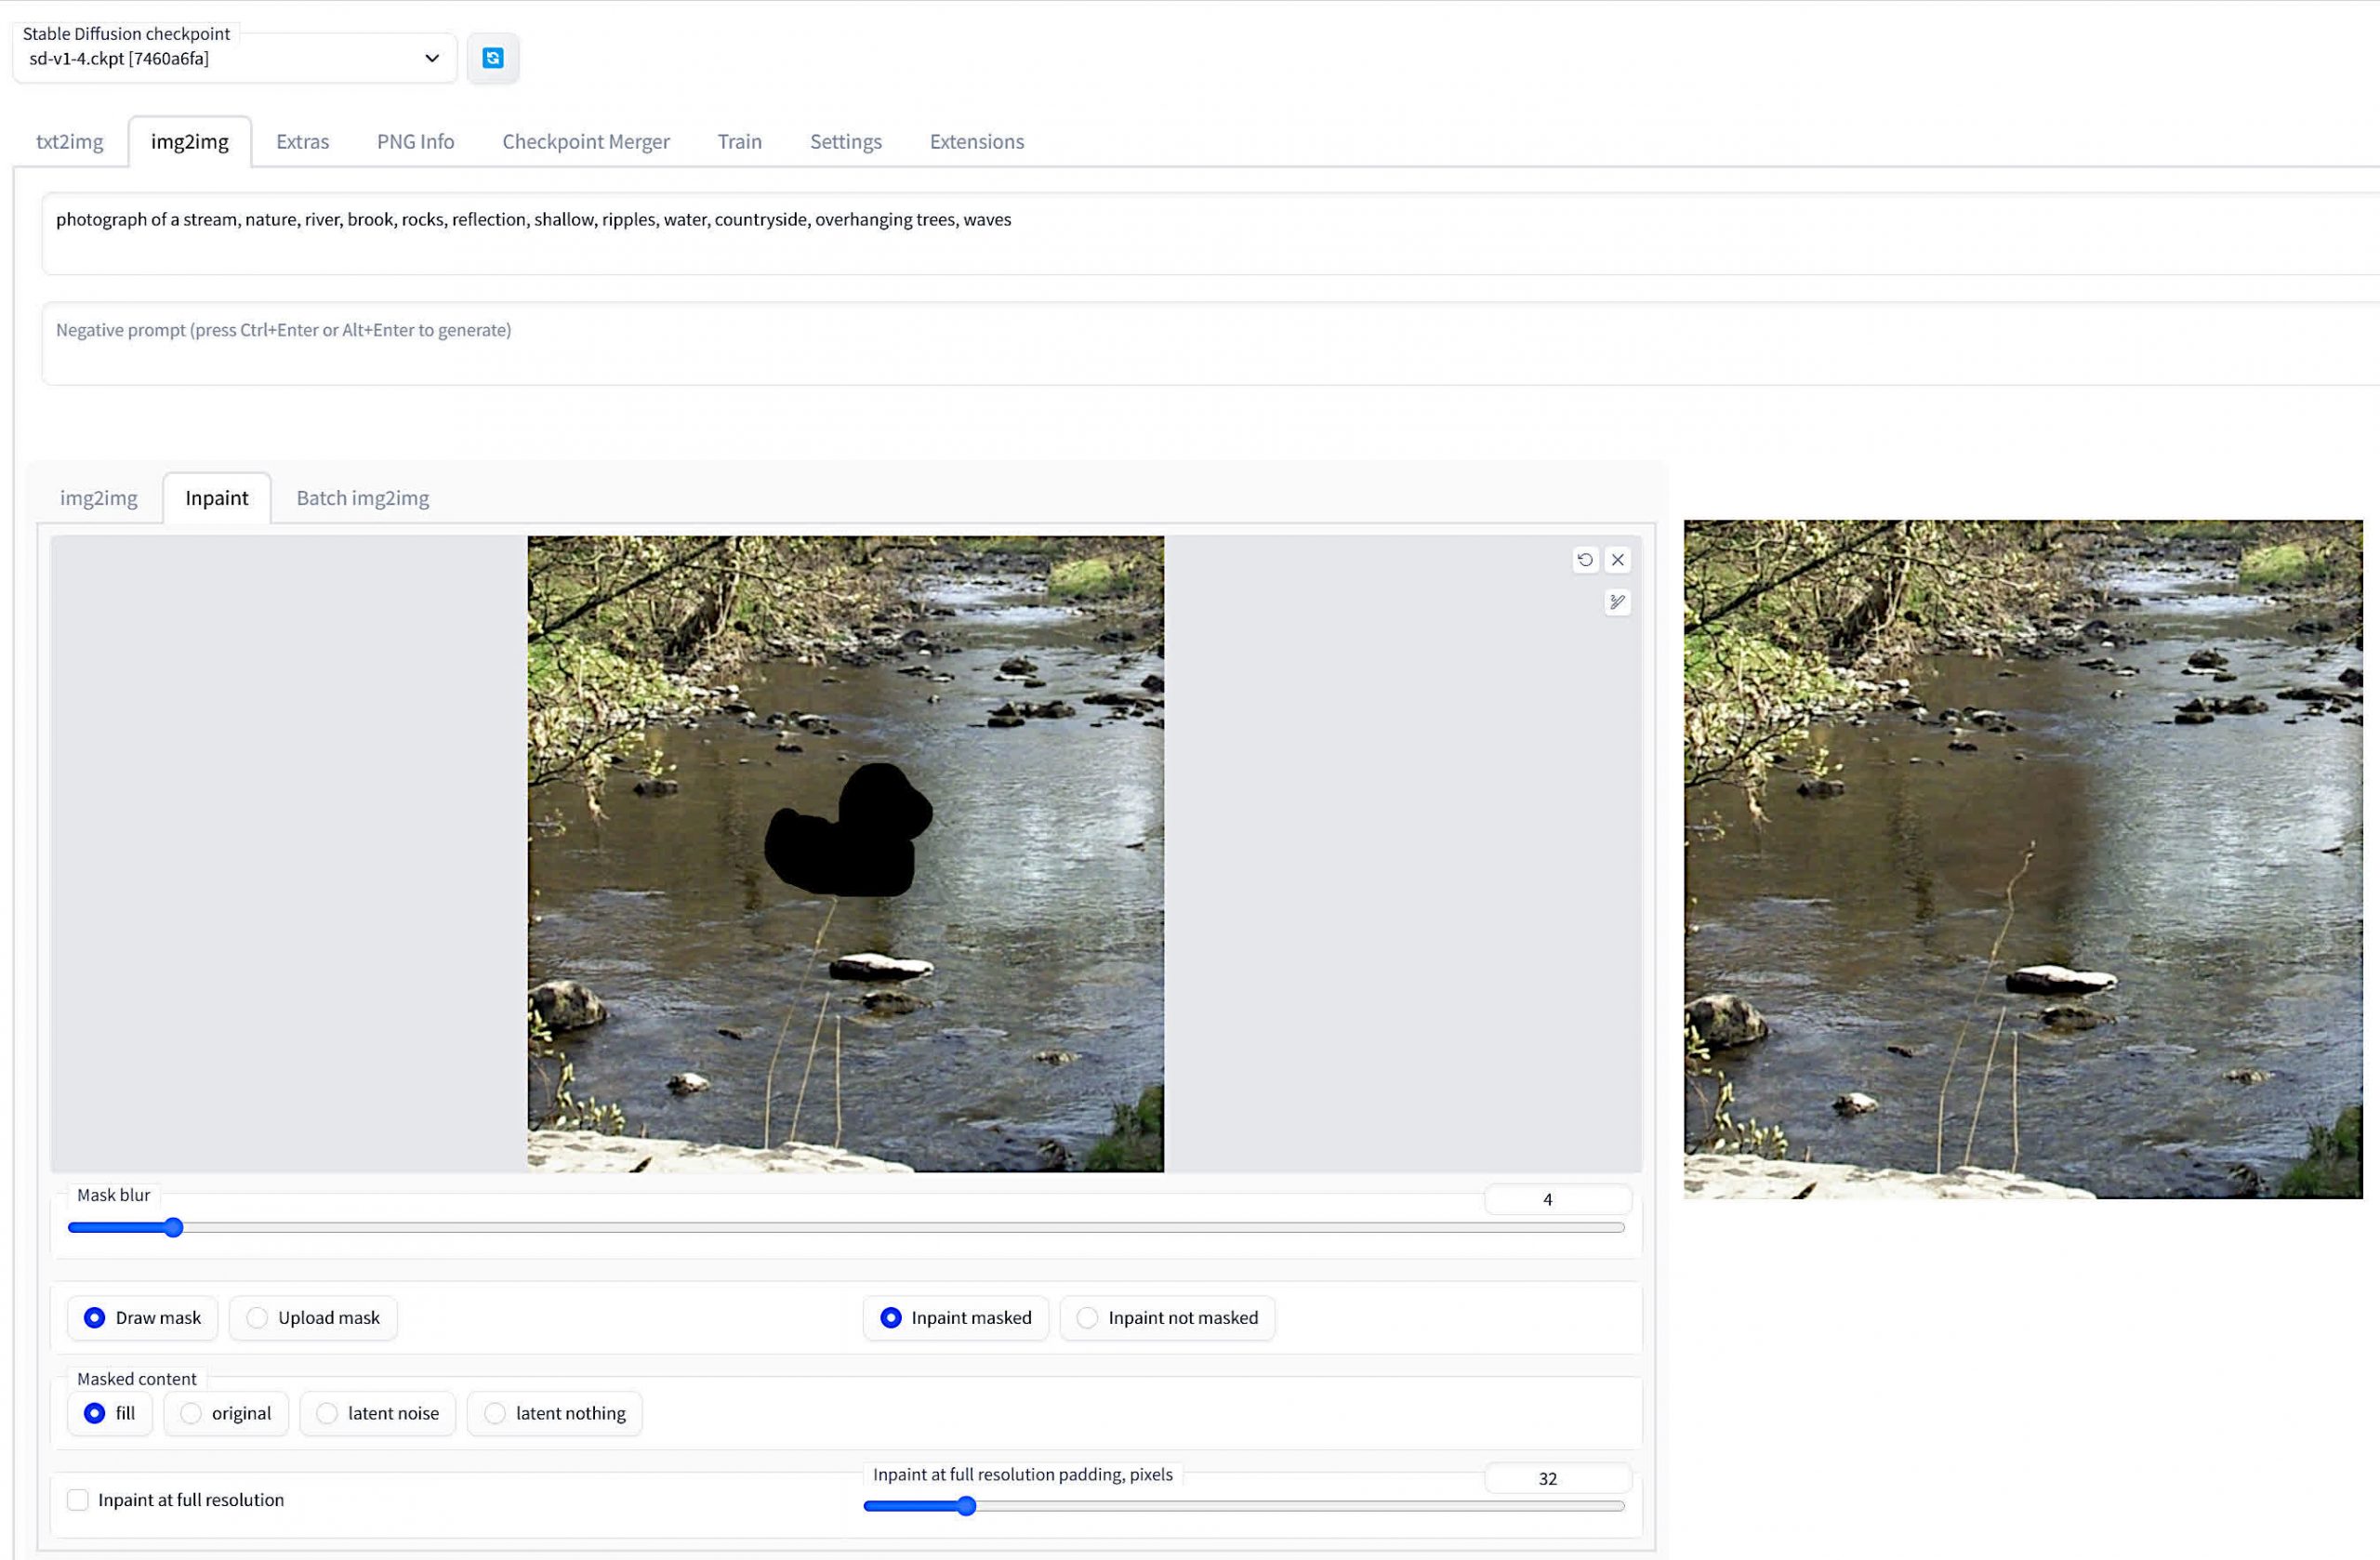
Inpainting involves removing a selected area from an image and then filling in that space with what should be there if the object wasn’t present. The feature is found in the main img2img tab, and then selecting the Inpaint sub-tab.
To make this work as best as possible, use lots of carefully chosen prompts (experiment with negative ones, too), a high number of sampling steps, and a fairly high denoising value.
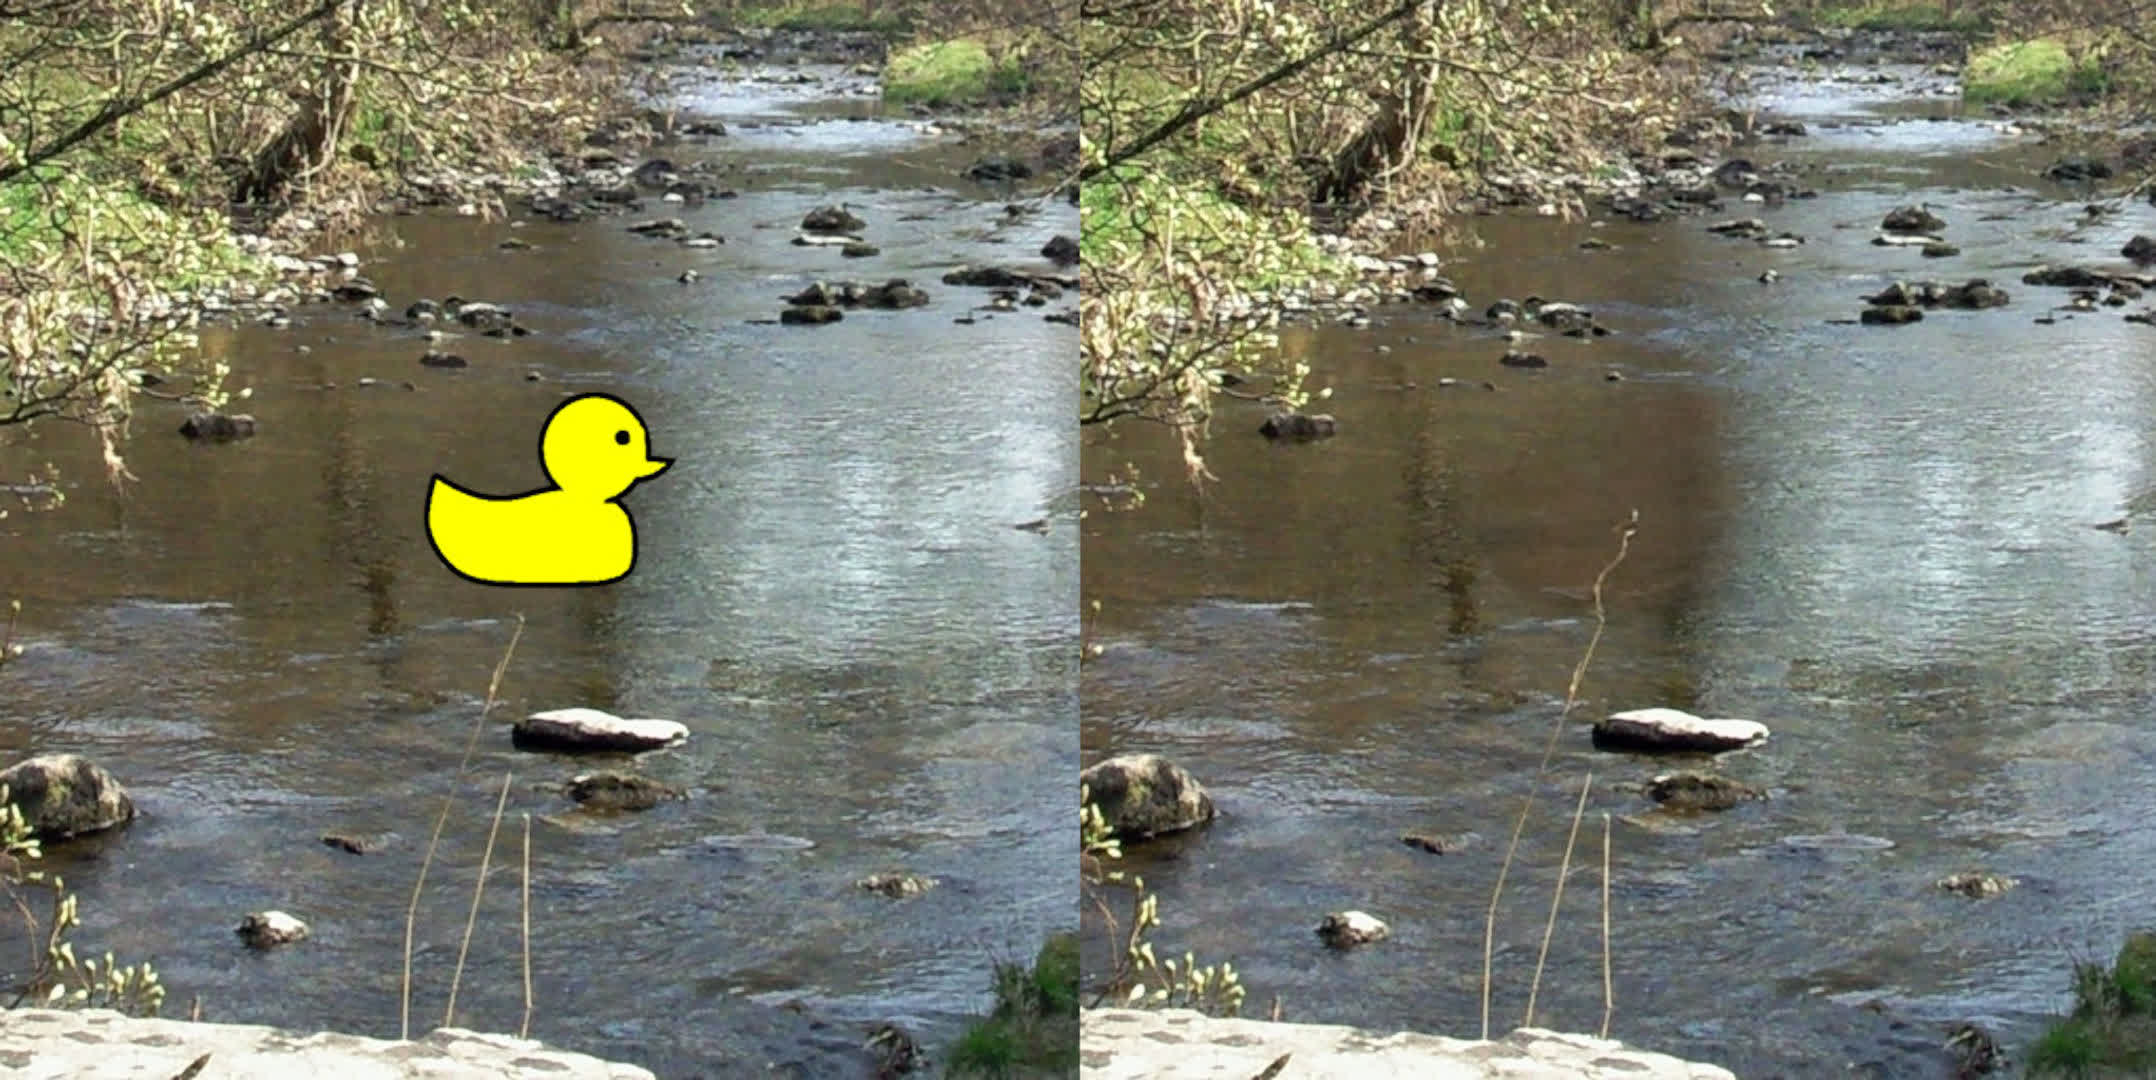
We took a photo of a shallow stream in the countryside, then added a flat icon of a rubber duck to the surface of the water. The default method in SDWUI is to just the built-in mask tool, which just colors in the area you want to remove in black.
If you look at the prompts in the screenshot above, you’ll see we include a variety of words that are associated with how the water looks (reflections, ripples, shallow) and included objects that affect this look too (trees, rocks).
Here’s how the original and inpainted images look, side-by-side:
You can tell something has been removed and a talented photo editor could probably achieve the same or better, without resorting to the use of AI. But it’s not especially bad and once again, with more time and tweaks, the end result could easily be improved.
Outpainting does a similar thing but instead of replacing a masked area, it simply extends the original image. Stay in the img2img tab and sub-tab, and go to the Scripts menu at the bottom — select Poor man’s outpainting.
For this to work well, use as many sampling steps as your system/patience can cope with, along with a very high value for the CFG and denoising scales. Also, resist the temptation to expand the image by lots of pixels; start low, e.g. 64, and experiment from there.
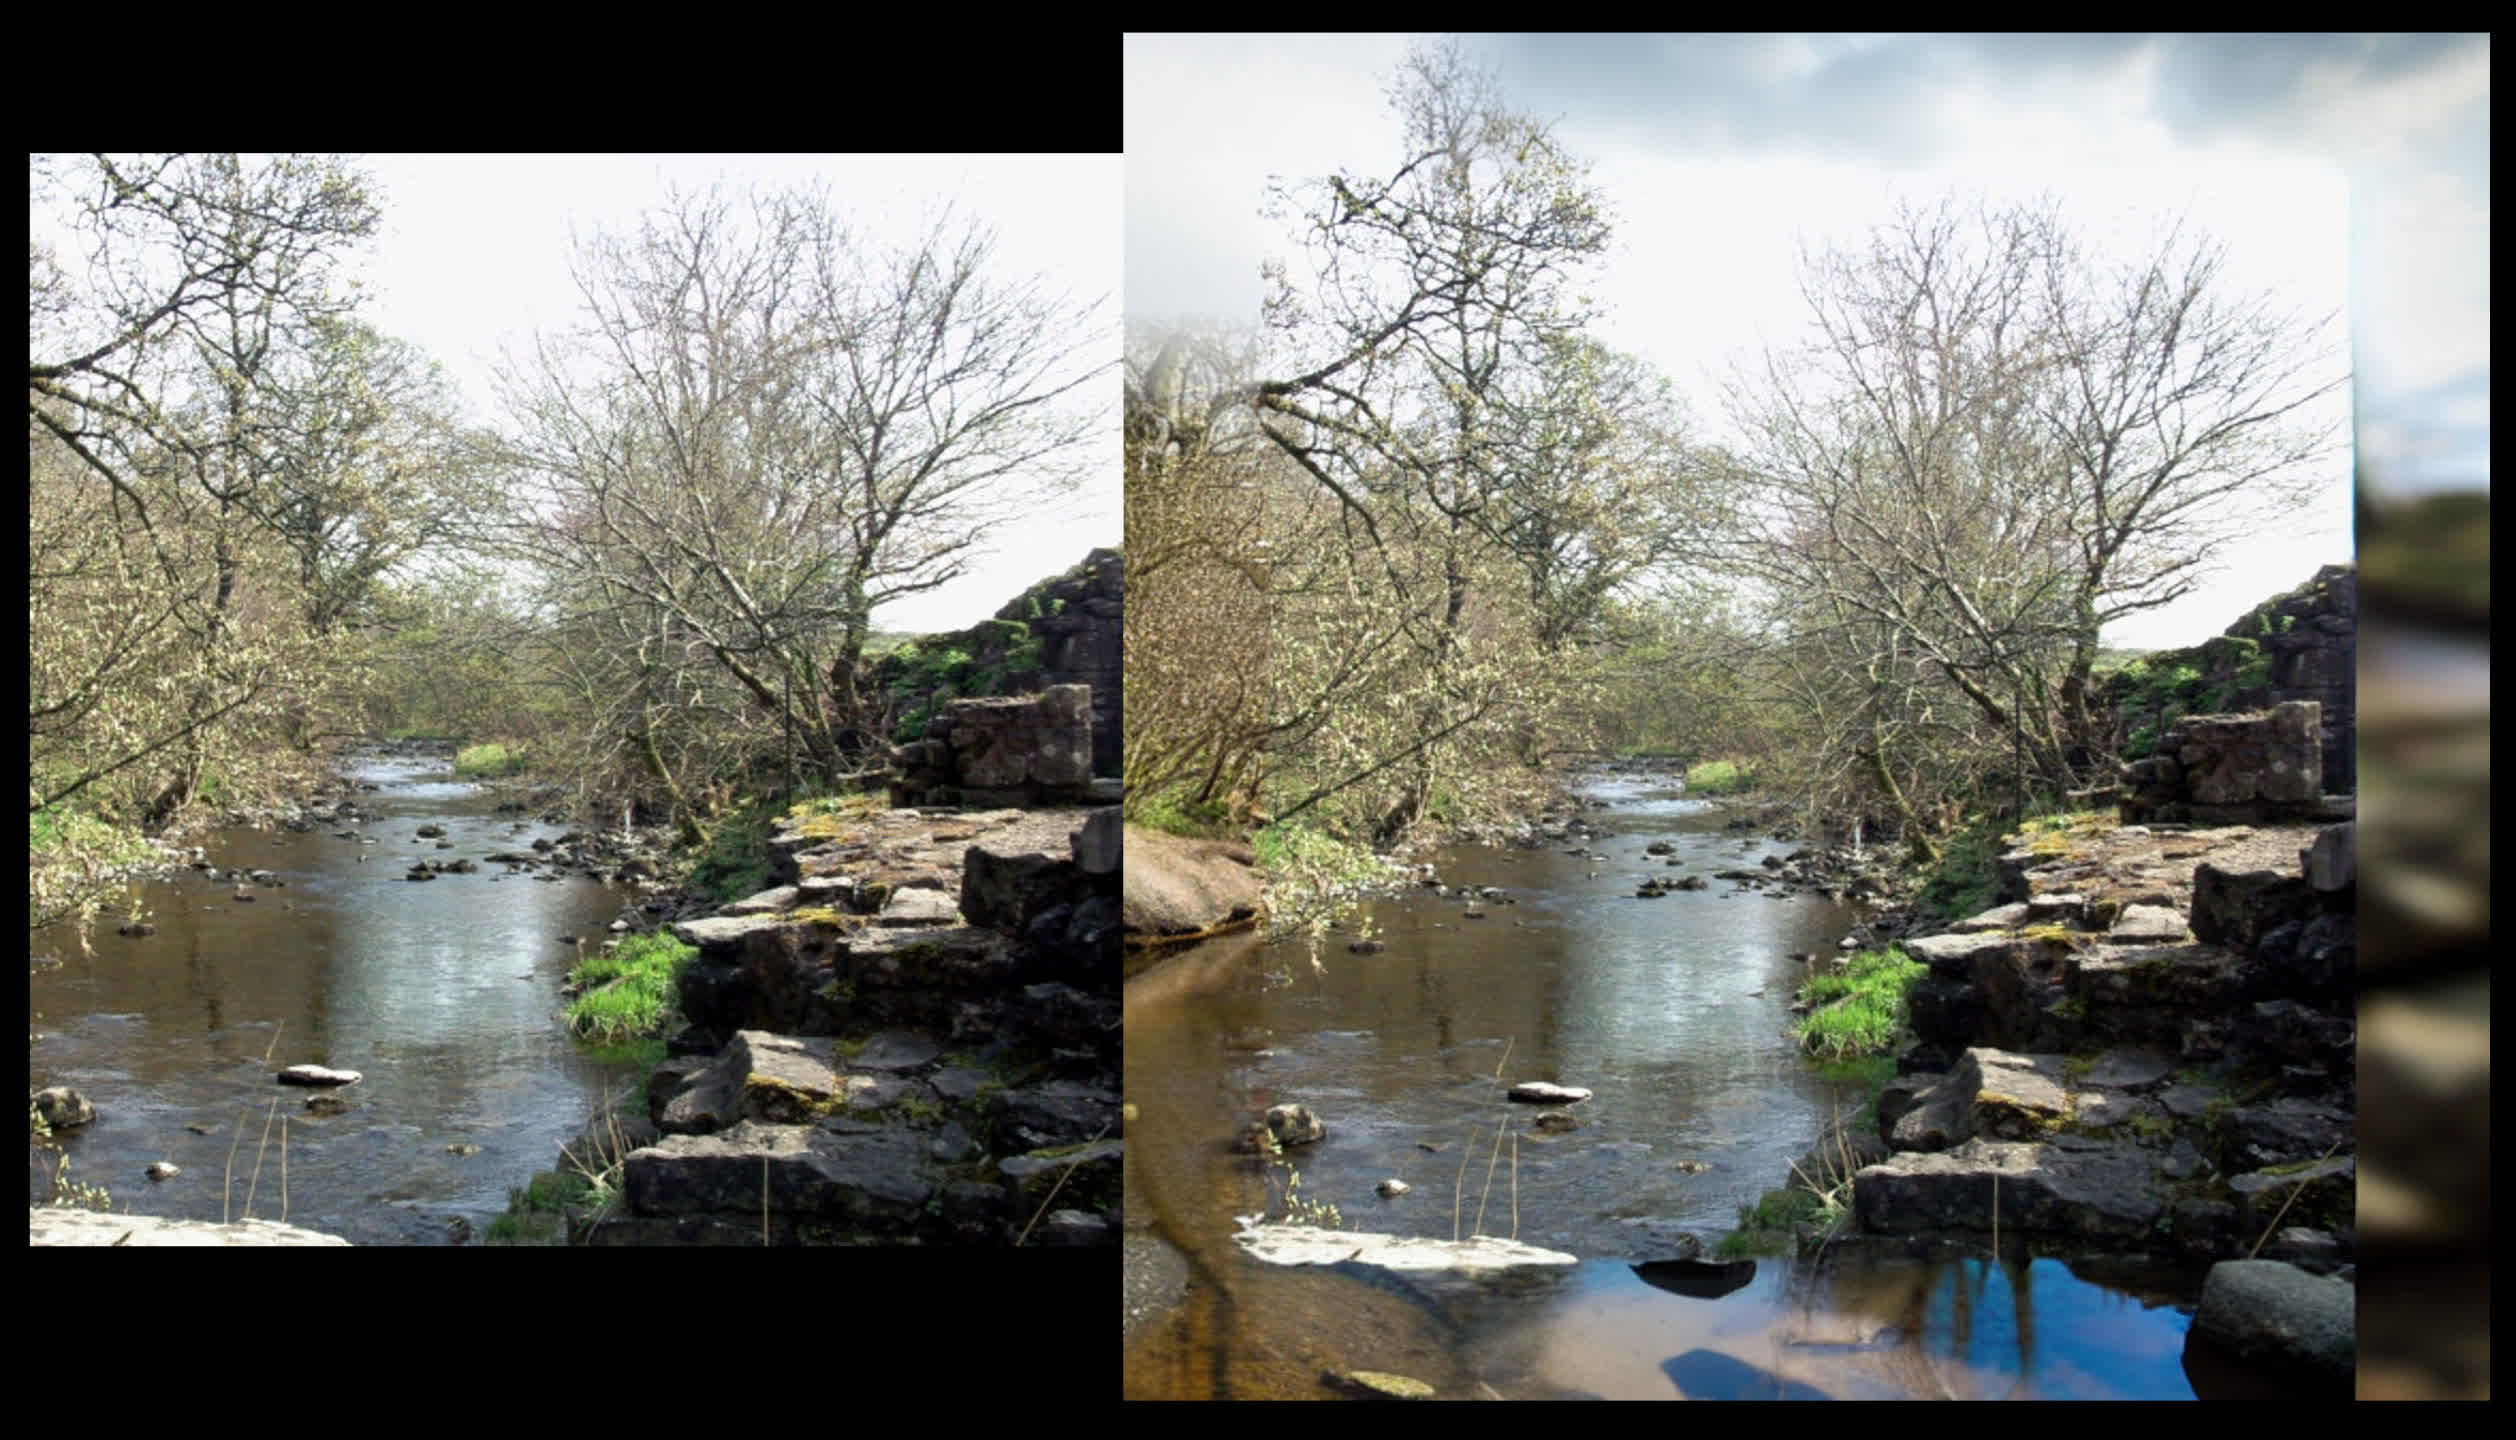
Taking our image of the stream, minus the rubber duck, we ran it through multiple attempts, adjusting the prompts each time. And here’s the best we achieved in the time available:
To say it’s disappointing would be an understatement. So what’s the problem here? Outpainting is very sensitive to the prompts used, and many hours could easily be spent trying to find the perfect combination, even if it’s very clear in your mind what the image should be showing.
One way to help improve the choice of prompts is to use the Interrogate CLIP button next to the Generate one. The first time you use this will force SDWUI to download a bunch of large files, so it won’t immediately, but once everything has been captured, the system will run the image through the CLIP neural network to give you the prompts that the encoder deems are the best fit.
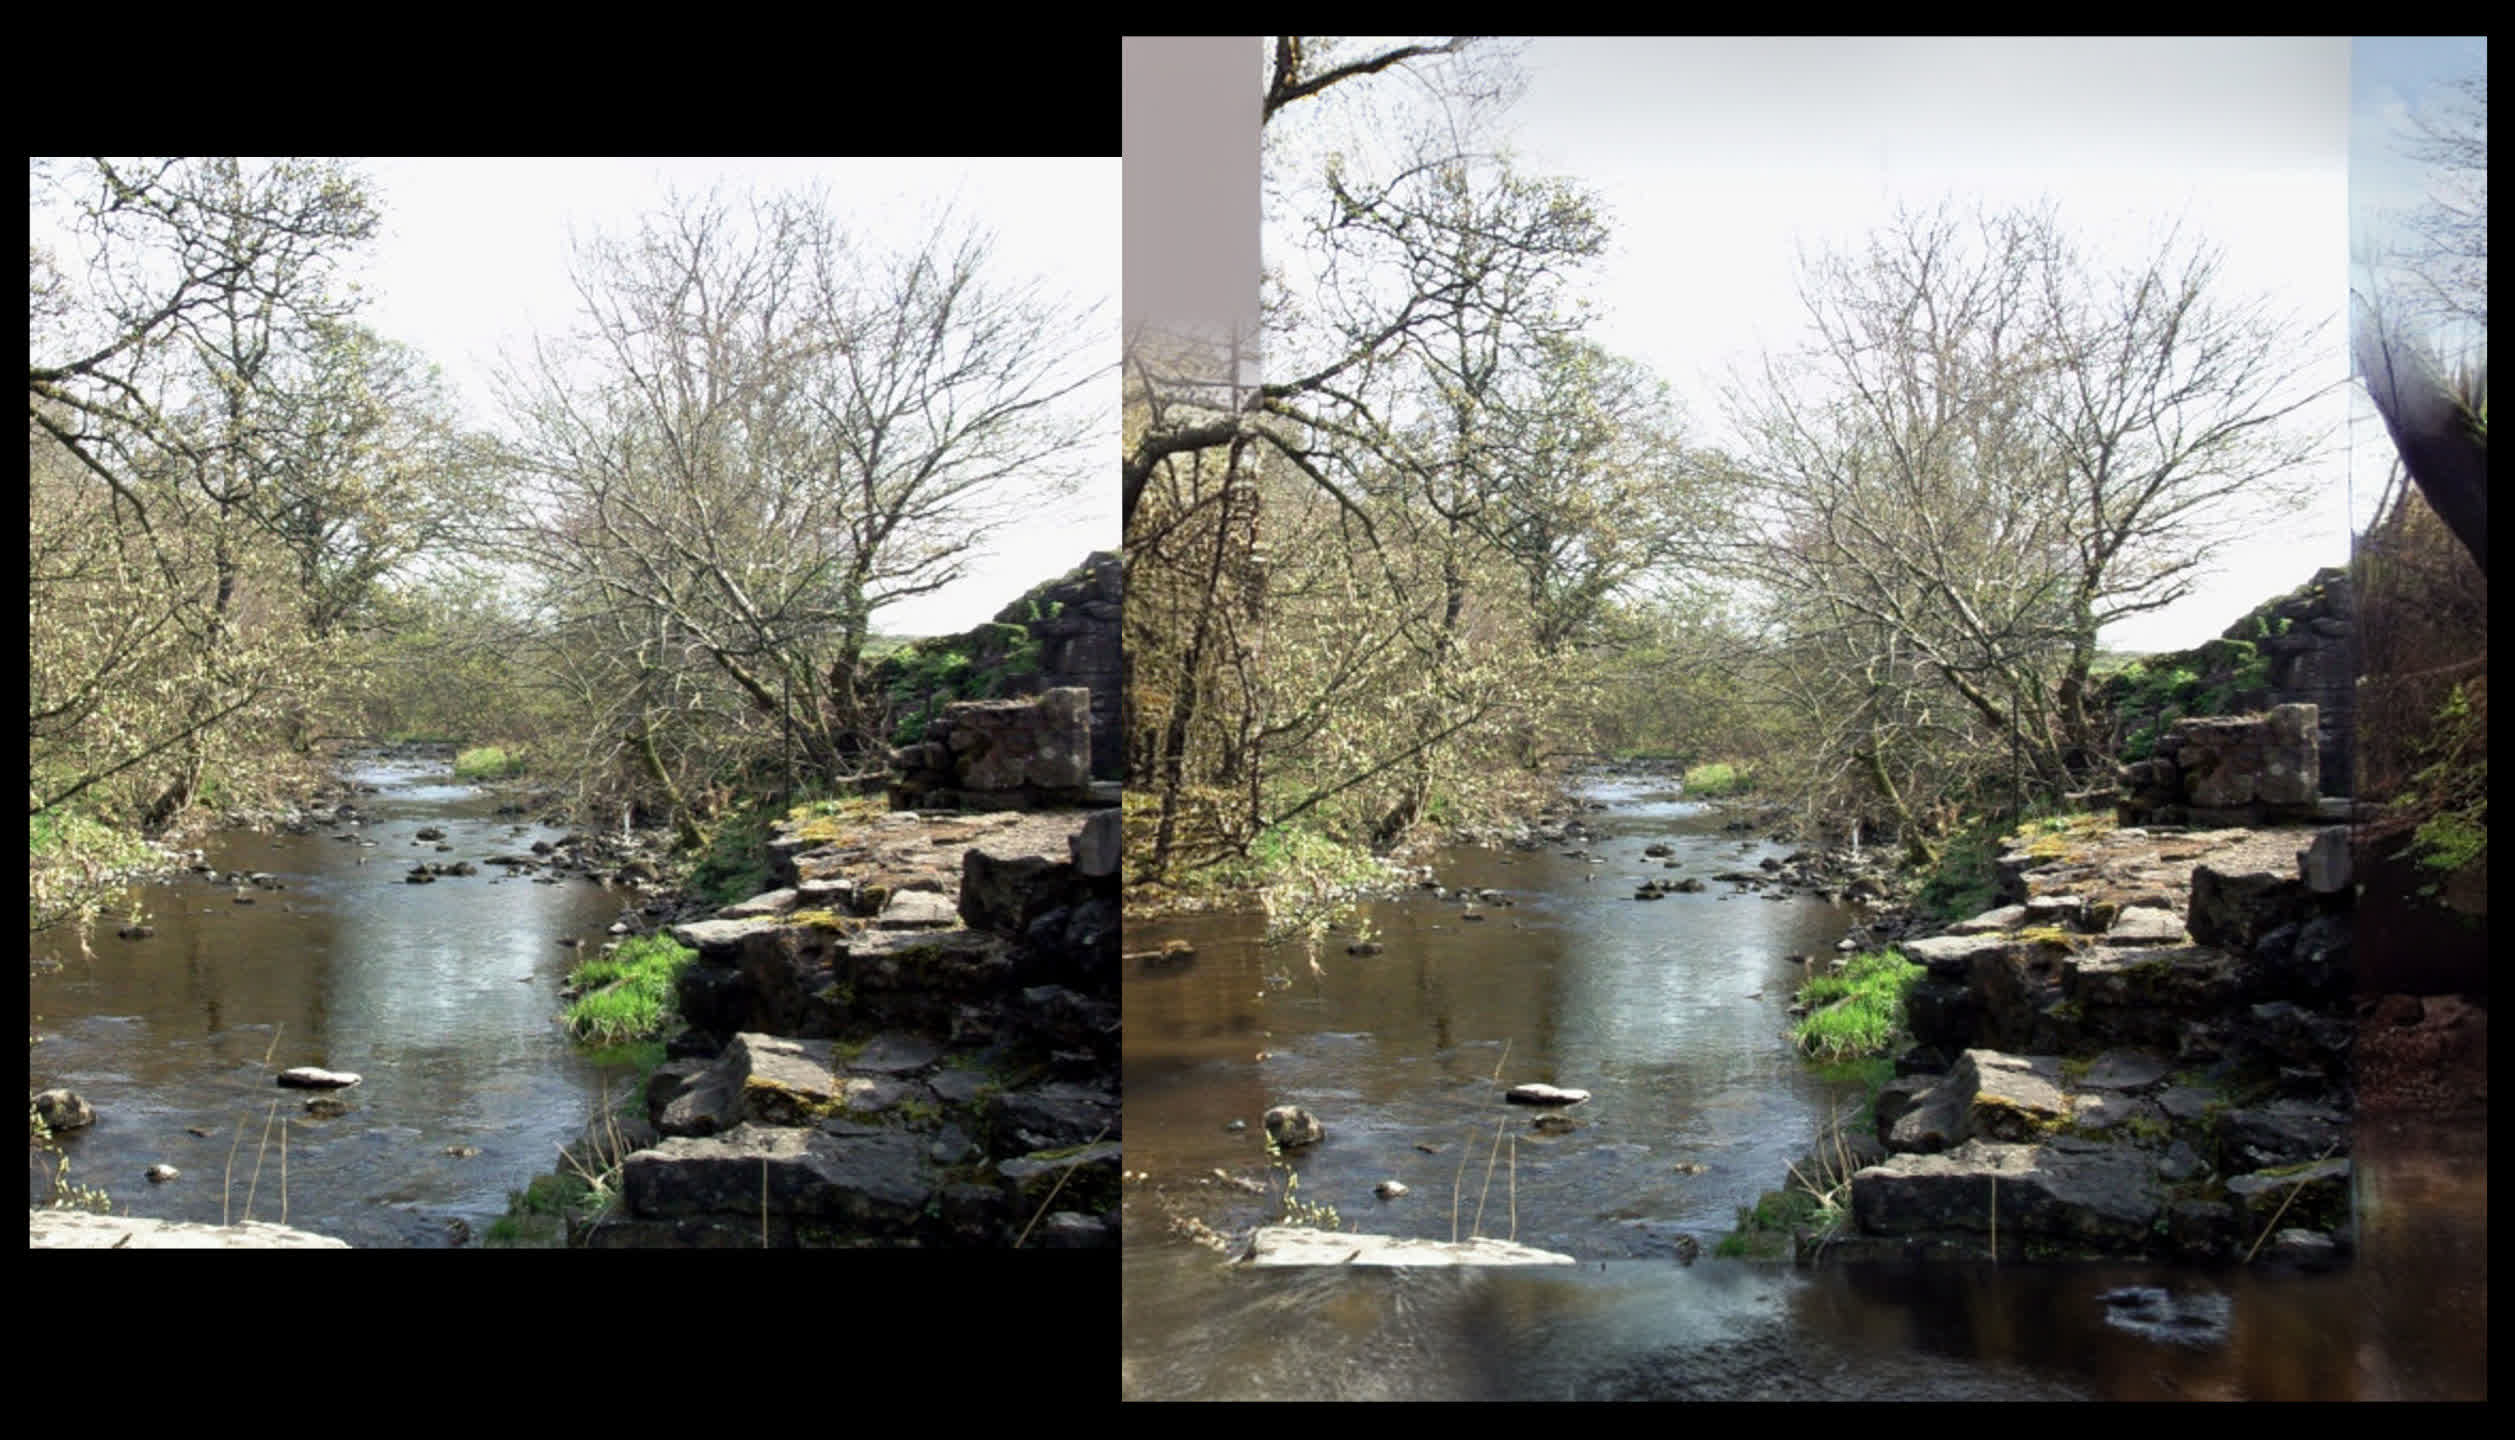
In our case, it gave us the phrase “a river running through a forest filled with trees and rocks on a sunny day with no leaves on the trees, by Alexander Milne Calder.” Calder, a US sculptor from the last century, definitely wasn’t involved in the taking of the photo but just using the rest as the prompt for the outpainting gave us this:
See how much better it is? The lack of focus and darkening are still issues, but the content that’s generated is very good. What this all shows, though, is very clear — Stable Diffusion is only as good as the prompts you use.
Training your own model
The first Stable Diffusion model was trained using a very powerful computer, packed with several hundred Nvidia A100 GPUs, running for hundreds of hours. So you might be surprised to learn that you can do your own training on a decent PC.
If you use SDWUI and prompt it “graphics card in a computer,” you won’t get anything really like it — most results typically just show part of a graphics card. It’s hard to say just how many images in the LAION-5B dataset would cover this scenario but it doesn’t really matter, you can adjust a tiny part of the trained model yourself.
You’ll need at least 20 images, taken from different angles and so on, and they must all be 512 x 512 in size for Stable Diffusion 1.x models or 768 x 768 for SD 2.x models. You can either crop the images yourself or use SDWUI to do it for you.
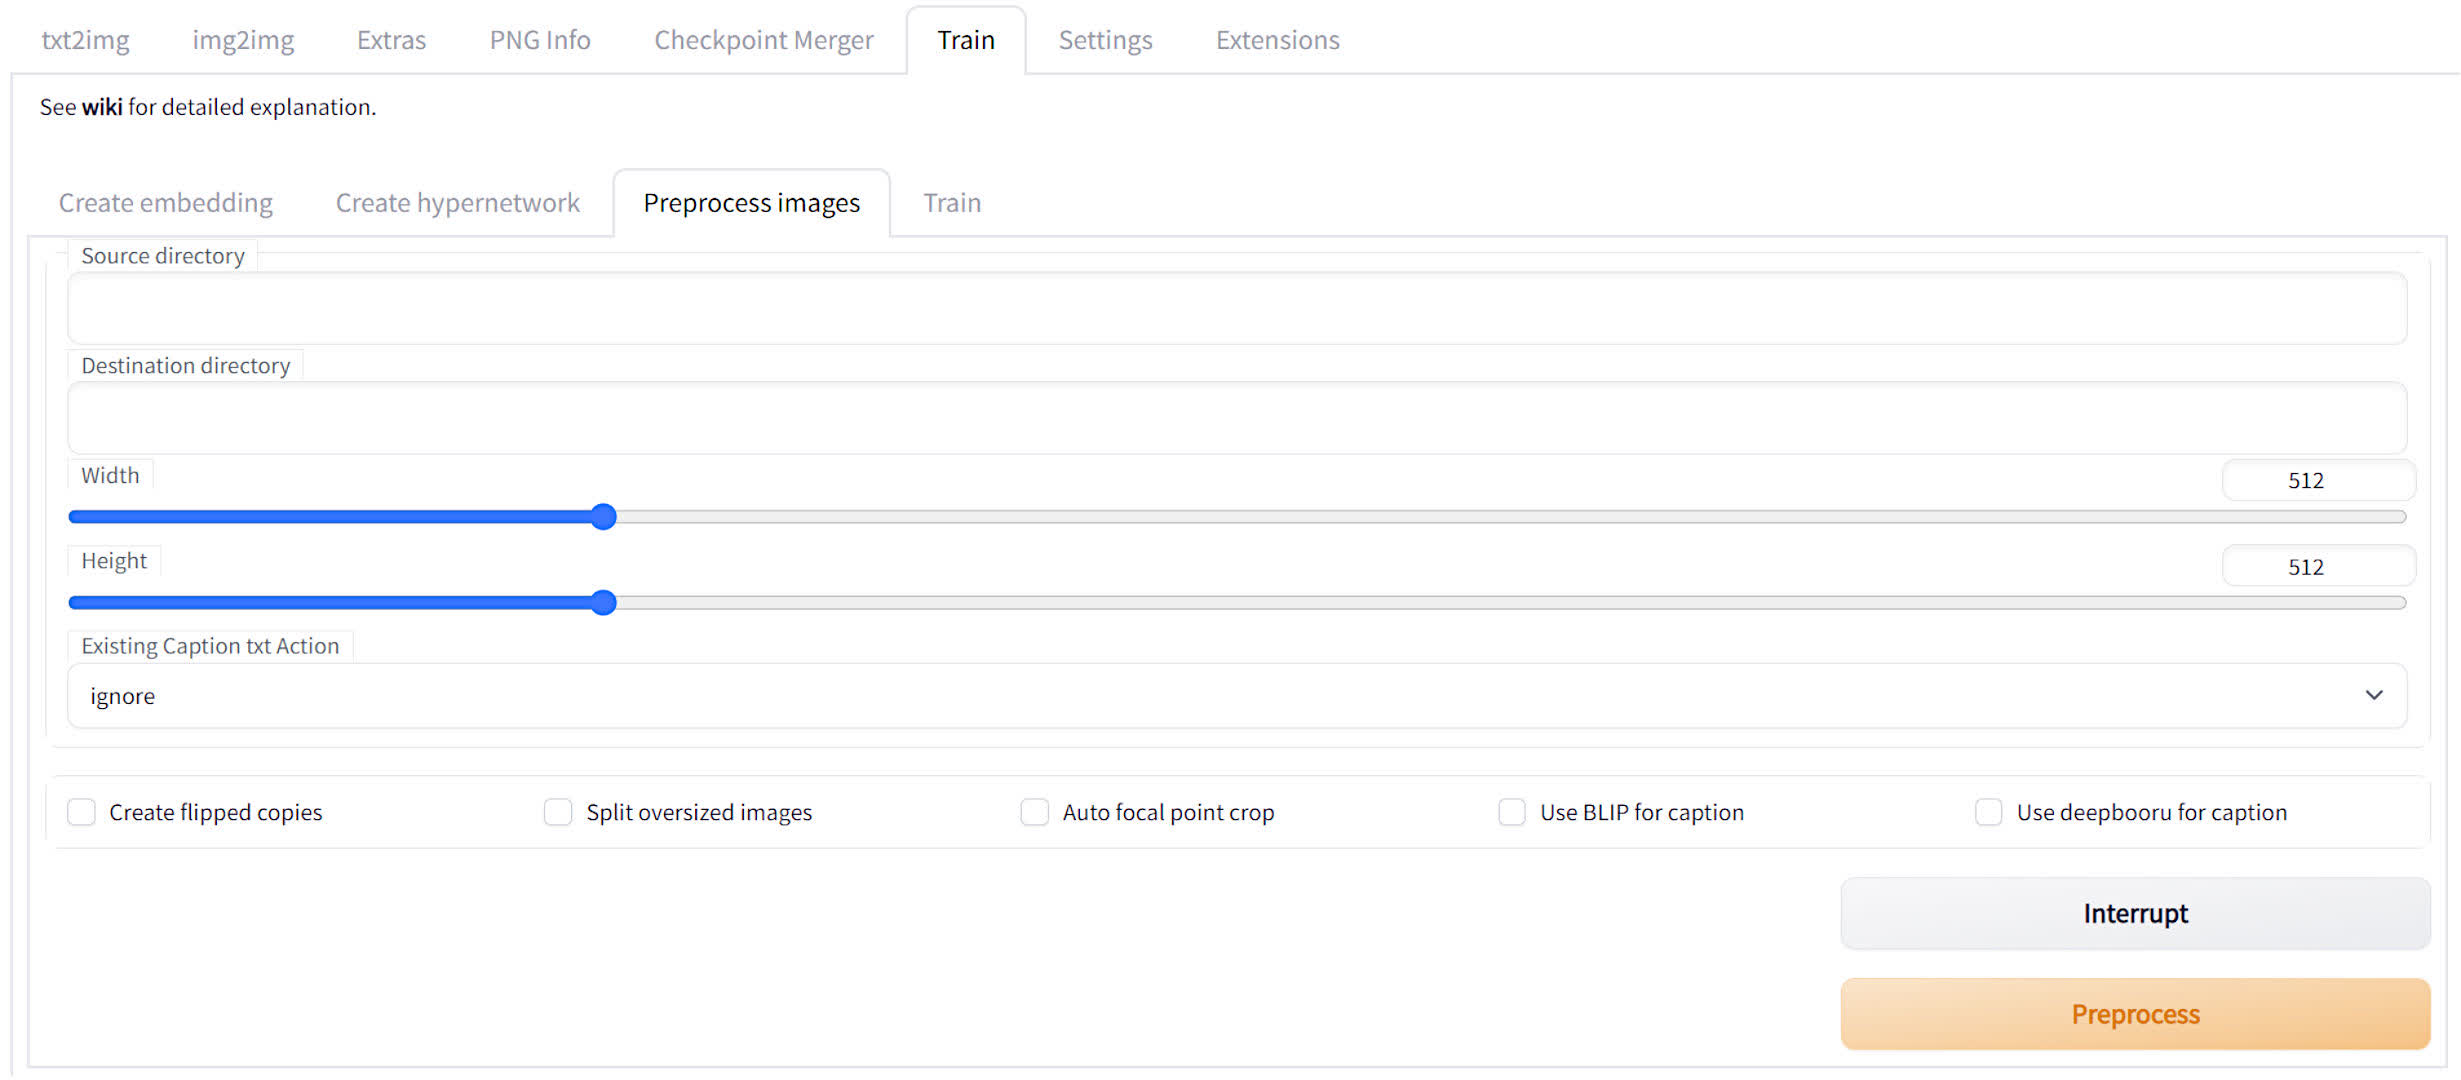
Go to the Train tab and click on the Preprocess images sub-tab. You’ll see two fields for folder locations — the first is where your original images are stored and the second is for where you want the cropped images to be stored. With that info all entered, just hit the Preprocess button and you’re all set to start training.Store them in a folder, somewhere on your PC, and make a note of the folder’s address.
First create an embedding file — click on the Create embedding sub-tab, give the file a name, followed by some initialization text. Pick something simple so it will be easy to remember when you type in prompts for text2img.
Then set the number of vectors per token. The higher this value is, the more accurate the AI generation will be, but you’ll also need increasingly more source images, and it will take longer to train the model. Best to use a value of 1 or 2, to begin with.
Now just click the Create embedding button and the file will be stored in the sdwebuiembeddings folder.
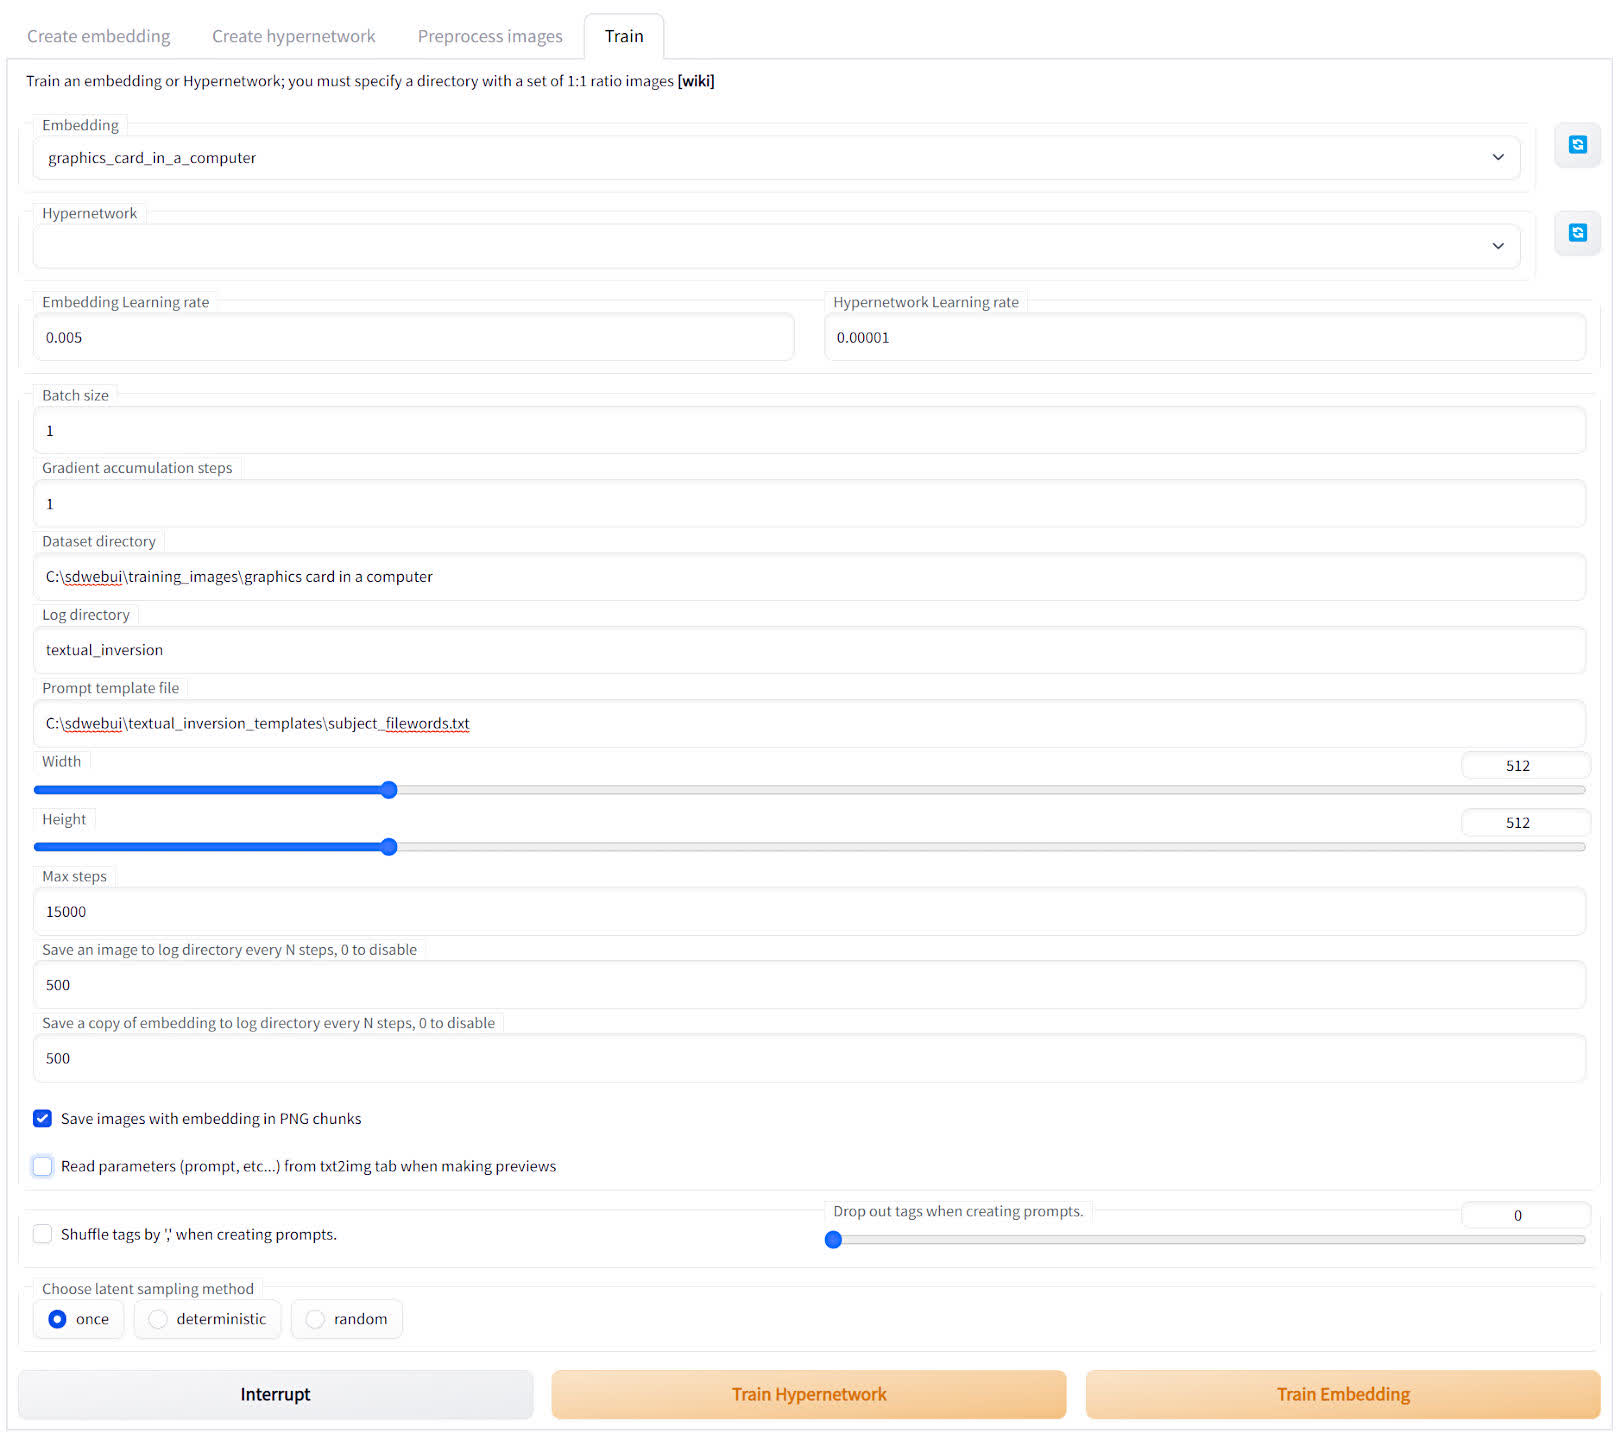
With the embedding file ready and your collection of images to hand, it’s time to start the training process, so head on to the Train sub-tab.
There are quite a few sections here. Start by entering the name of the embedding you’re going to try (it should be present in the drop-down menu) and the dataset directory, the folder where you’ve stored your training images.
Next, have a look at the Embedding Learning rate — higher values give you faster training, but set too high and you’ll run into all kinds of problems. A value of 0.005 is appropriate if you selected 1 vector per token.
Then change the Prompt template file from style_filewords to subject_filewords and lower the number of Max steps to something below 30,000 (the default value of 100,000 will go on for many hours). Now you’re ready to click the Train Embedding button.
This will work your PC hard and take a long time, so make sure your computer is stable and not needed for the next few hours.

After about 3 hours, our training attempt (done on an Intel Core i9-9700K, 16GB DDR4-3200, Nvidia RTX 2080 Super) was finished, having worked through a total of 30 images scraped from the web.
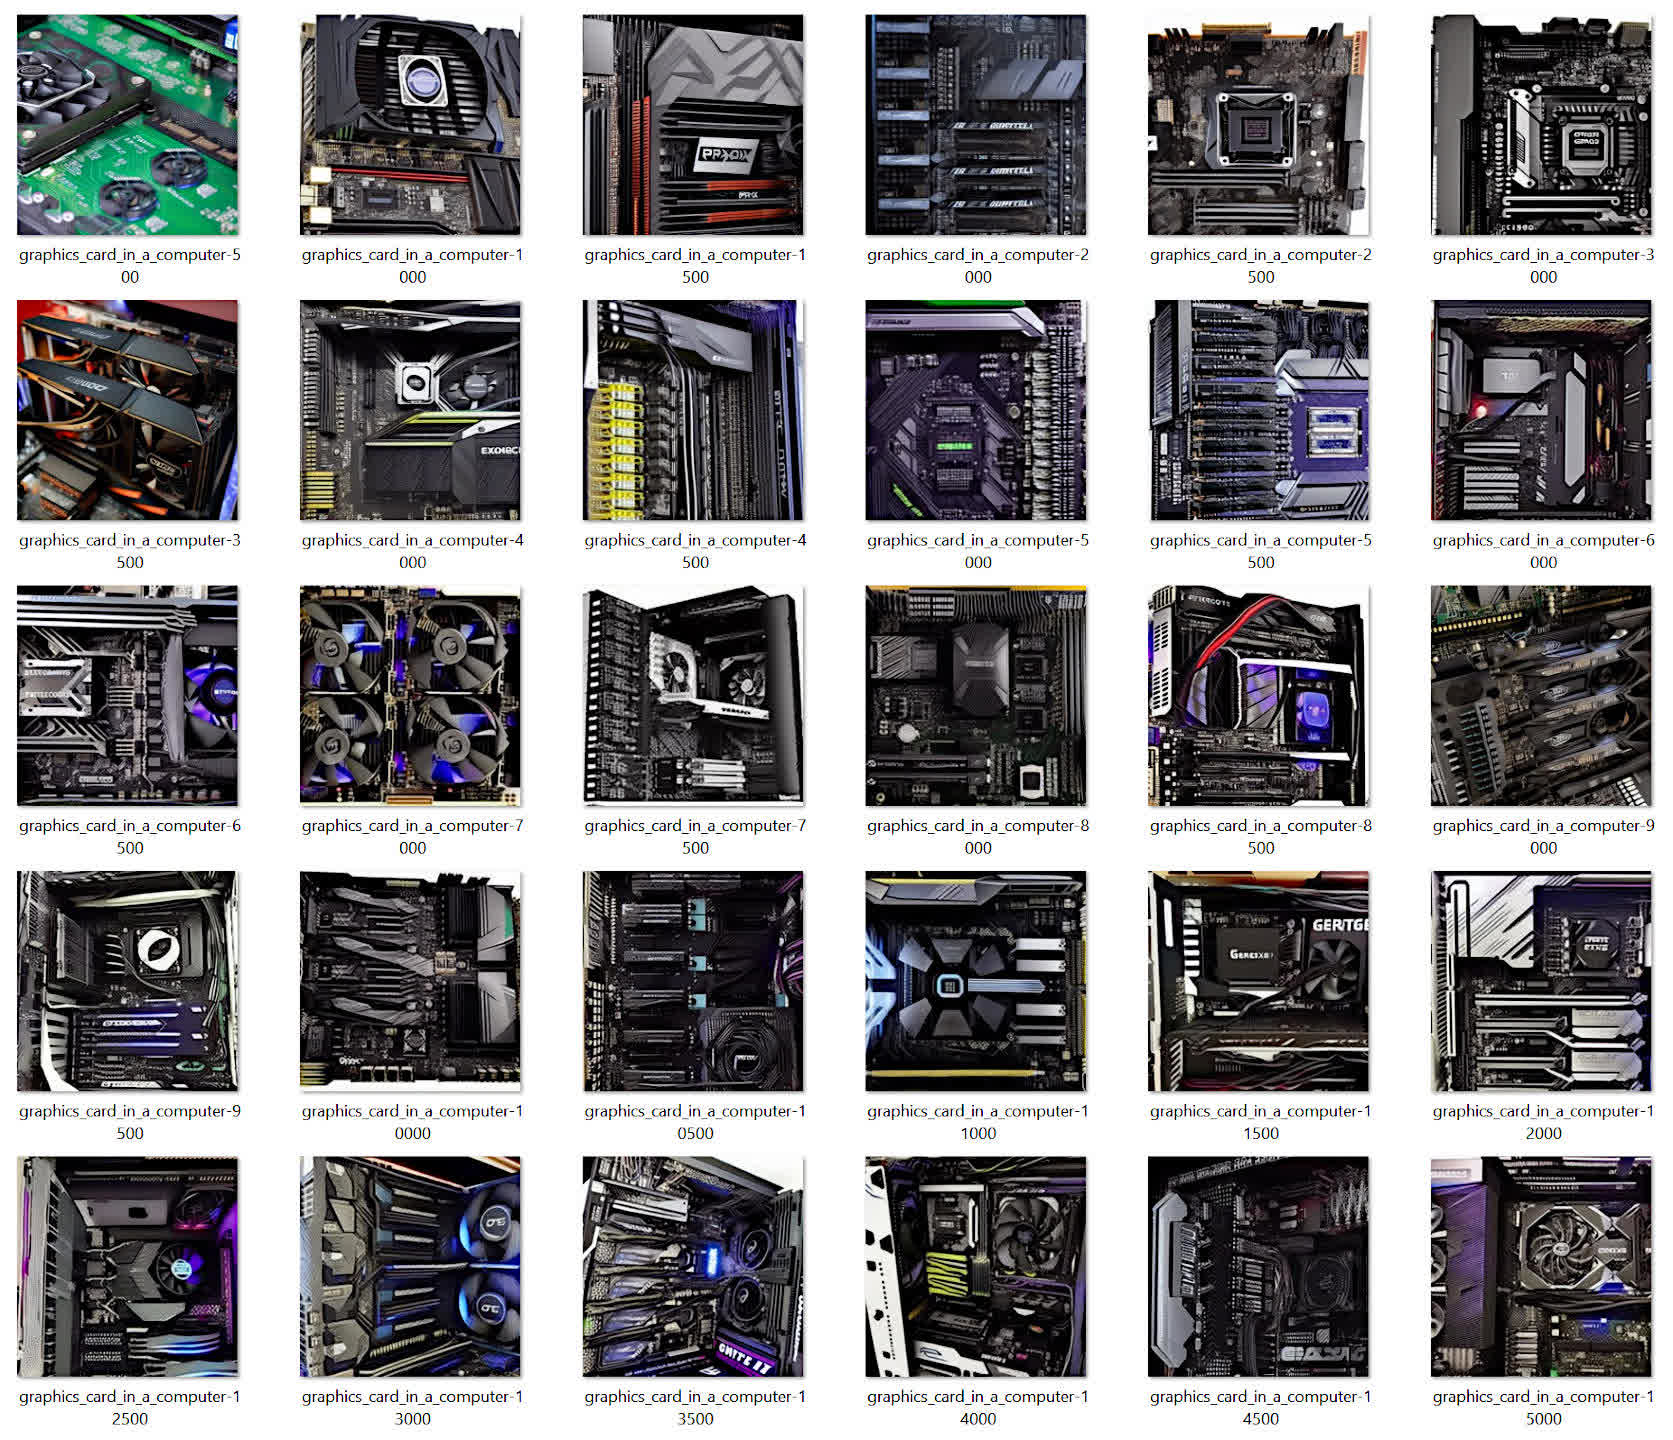
All of the results of the training get stored in the textural_inversion folder and what you get are multiple embeddings and an associated image for each one. Go through the pictures in the images folder and make a note of the name of the one that you like the most, which wasn’t easy in our case.
Most of them are pretty awful and that’s down to two things — the quality of the source images for the training and the number of steps used. It would have been better for us to have taken our own photos of a graphics card in a computer, so we could ensure that the majority of the picture focused on the card.
Once you’ve chosen the best image, go into the embeddings folder and select the file that has the same name. Copy and paste it into embeddings folder in the main SDWUI one. It’s a good idea to rename the file to something that indicates the number of vectors used if you’re planning on training multiple times.
Now all you need to do is restart SDWUI and your trained embedding will be automatically included in the AI generation, as shown below.

If, like us, you’ve only done a handful of images or just trained for a couple of hours, you may not see much difference in the txt2img output, but you can repeat the whole process, by reusing the embedding you created.
The training you’ve done can always be improved by using more images and steps, as well as tweaking the vector count.
Tweak ’till the cows come home
Stable Diffusion and the SDWUI interface has so many features that this article could easily be three times as long to cover them all. You can check out an overview of them here, but it’s surprisingly fun just exploring the various functions yourself.
The same is true for the Settings tab — there is an enormous amount of things you can alter, but for the most part, it’s fine to leave them as they are.
Stable Diffusion works faster the more VRAM your graphics card has — 4GB is the absolute minimum, but there are some parameters that can be used to lower the amount of video memory used, and there are others that will utilize your card more efficiently, too.
Batch file settings
Right-click on the webui batch file you use to start SDWUI and click on Create shortcut. Right-click on that file and select Properties. In the Target field, the following parameters can be added to alter how SDWUI performs:
- –xformers = enables the use of the xFormer library which can substantially improve the speed that images are generated. Only use if you have an Nvidia graphics card with a Turing or newer GPU
- –medvram = reduces the amount of VRAM used, at a cost of processing speed
- –lowvram = significantly reduces the amount of VRAM needed but images will be created a lot slower
- –lowram = stores the stable diffusion weights in VRAM instead of system memory, which will improve performance on graphics cards with huge amounts of VRAM
- –use-cpu = some of the main features of SDWUI will be processed on the CPU instead of the GPU, such as Stable Diffusion and ESRGAN. Image generation time will be very long!
There are a lot more parameters that can be added, but don’t forget that this is a work-in-progress project, and they may not always function correctly. For example, we found that Interrogate CLIP didn’t start at all, when using the –no-half (prevents FP16 from being used in calculations) parameter.
While we’re on the point of GPUs, remember that Stable Diffusion was developed for Nvidia graphics cards. SDWUI can be made to work on AMD GPUs by following this installation process. Other implementations for Stable Diffusion are available for AMD graphics cards, and this one for Windows has detailed installation instructions. You won’t get a UI with that method, so you’ll be doing everything via the command prompt.
With most of the basics covered, you should have enough knowledge to properly dive into the world of AI image generation. Let us know how you get on in the comments below.
